|
USS ESSEX (CV-9)
and AVG-83
Part Five - VB-83
Curtiss SB2C-4 Helldiver
by Mark Beckwith
|
 |
|
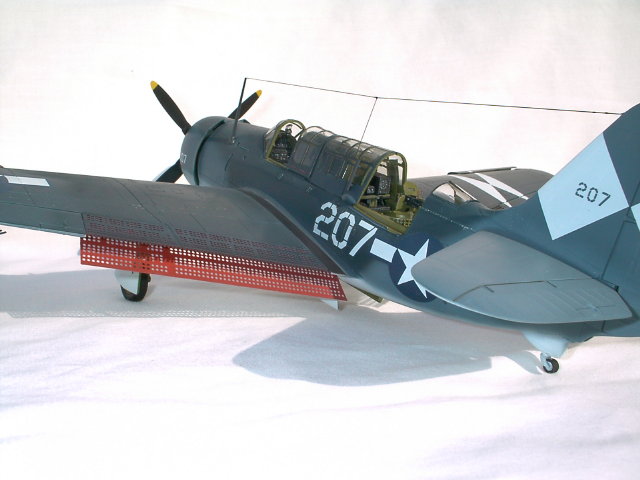
VB-83 Curtiss SB2C-4
Helldiver |

HyperScale is proudly sponsored by Squadron.com
AVG-83
Aircraft Part Five
|
VB-83 Curtiss SB2C-4
Helldiver
The Helldiver was ordered into
large-scale production in 1940, the prototype making its first flight on 18
December of that year. SB2Cs went into action for the first time on 11 November
1943 in a heavy raid on the major Japanese base of Rabaul, flying from the new
Essex Class carrier Bunker Hill.
This large, heavy, impressive and
powerful dive-bomber was intended as an improvement on the SBD Dauntless, which
it was to replace. However, during the SB2C's development it became apparent
that there were serious problems with its design. Combat experience, especially
at the Battle of the Philippine Sea, revealed that the Dauntless was in fact the
superior aircraft. The Helldiver's handling was poor - in particular it had
unsatisfactory low-speed stability, and dangerously poor stalling
characteristics. However, it was at this stage impossible to reverse the
changeover to the Helldiver, and the Philippine Sea battle was the SBD's last
major action as a carrier aircraft.
The -4 version finally produced an
aircraft worthy of the earlier promise. Dive stability had been greatly
improved by further perforating the dive flaps, bugs in the (still) overly
complex hydraulic system had been worked out, and it's crews were beginning to
have faith in their mount. At the same time however, evolving carrier
operational tactics were reducing (and in some cases even eliminating) carrier
bomber squadron strengths.
Despite its initial lackluster
showing - and its inherent defects - the SB2C served as the sole shipborne
dive-bomber of the US Navy from late 1944 until the end of the war, eventually
inflicting more damage on enemy shipping and installations that its predecessor
, the SBD Dauntless.
Helldiver
Data
Type: Two-seat carrier-based
dive-bomber
Dimensions: Length 36' 8", span
49' 9", height 16' 11".
Weight
(typical): Empty 11,000 lb, loaded 16,607 lb
Engine: One 1,700 hp Wright
R-2600-8 Cyclone 14-cylinder radial.
Performance: Maximum speed 281
mph, service ceiling 24,700 feet
Range: 1,110 miles
Armament (later versions):
-
1,000 lb bomb load in internal bay
(later versions also having provision
for bombs under wings)
Two fixed forward-firing 20mm cannon or four fixed
forward-firing 0.5-inch Browning machine-guns in wings
Twin manually-aimed
0.3-inch or 0.5-inch Browning machine-guns in rear cockpit
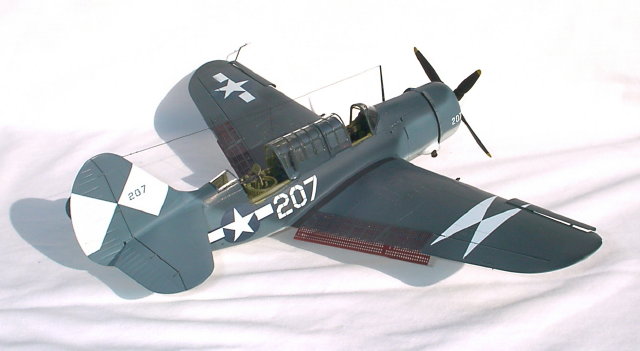
1/48 Pro Modeler SB2C-4
Helldiver

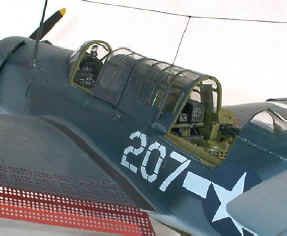
Construction
Construction is broadly the same as
for the previous models. Built basically OOB with some minor scratch built
additions to the cockpit.
 Notable differences include the use of the included PE parts and the
level of quality of the kit far exceeded my expectations. To my mind this
kit is at least of the same quality as Tamigawa and AM. I did use a little
filler I'm sure, but I honestly don't remember where. I was given a heads
up regarding the wing roots, but with care I found that they worked well for me. Notable differences include the use of the included PE parts and the
level of quality of the kit far exceeded my expectations. To my mind this
kit is at least of the same quality as Tamigawa and AM. I did use a little
filler I'm sure, but I honestly don't remember where. I was given a heads
up regarding the wing roots, but with care I found that they worked well for me.
The interior was painted with Gunze Interior Green, which is a slightly
darker shade than MM. I was during this stage that I did make a couple of
mistakes however. I had intended right from the start to display the model
with lowered flaps. However, I failed to cut the supports of the wing and
settled with only dropping the PE portion. Since these photos were taken,
I've raised the flaps to the upper position.
The other error was in not installing the life raft in the rear cockpit
until it was too late to make it fit. I just settled for that as I didn't
realize this until the model was painted. Initial construction finished
with masking the canopy with a mixture of Tamiya tape and Parafilm M.
Paint & Decals
Essex's VF-83 Helldivers were -4's
painted in the Tri Colour scheme, with a couple of replacement aircraft joining
in late July painted in GSB. Again, I had a particular plane in mind which
appears on page 68 of Barret Tillman's "Helldiver Units of WW2".
Aeromaster makes a decal sheet for this particular aircraft, which I had bought
and intended to use.
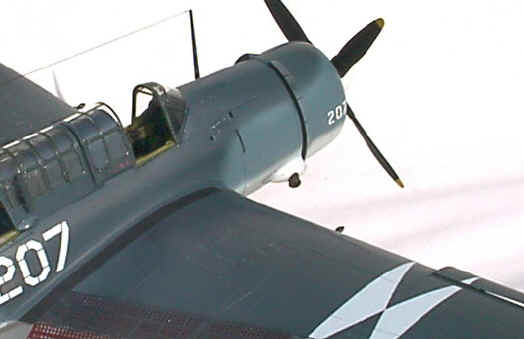
I began with the white underside,
using the Badger 200, and gave it several coats of MM Acrylic Insignia
White. I also painted the prop cowl white, though it could also have been
Intermediate Blue, with no photo available of this particular plane I just made
a judgment call based on my feeling the white looked better! When this was
cured, I switched to my Badger 155 double action and applied the Intermediate
Blue, this time MM Enamel, freehand. I prefer enamels when spraying
freehand as I find I get greater control and a finer demarcation line between
colours. When the intermediate blue was dry, I applied the dark blue
(FS35042), again using MM enamel sprayed through the Badger 155. There
were some inevitable over sprays and mistakes to correct,
but overall this attempt at the tri colour scheme went well for me and I was
pleased with the result. Once the paint was fully cured, I think I left it
alone to cure for at least 3 days, I applied the gloss coat, again using
Metalizer Sealer.
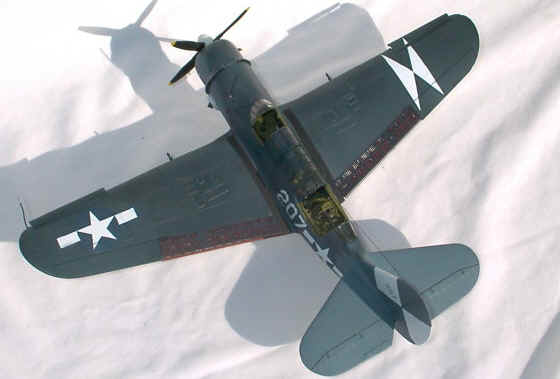
Decaling for me always begins with
the national insignia. This one was no exception and I used the Aeromaster
supplied ones. They went down well, I used Micro Sol only and experienced
no problems with wrinkling or silvering. The trickiest part of the
decaling process was using the vertical stabilizer decals. They were
slightly oversize and needed some persuasion to melt down into the rudder hinge
area and over the rudder tab mechanism. I eventually cut the decals to
help them get over these surface irregularities and touched up with paint when
they were dry. All the other decals went down with little trouble. I
applied very few stencils as the photo of the subject aircraft showed very few
to be present, though I am fully aware of other shots of (newer?) aircraft
covered with all the stencils applied at the production plant. The only
other thing worth mentioning about the decaling process was that I had to paint
the G-Symbol on the wings as Aeromaster had not seen fit to included them in the
sheet. This was accomplished with little trouble and finally it was ready
for the sealing coat and weathering.
As usual, I sealed with a couple of coats of heavily diluted light gray
to fade down the paintwork, again making sure to fade down the areas in direct
sunlight with the wings folded a little more. Dullcoat was next, bringing
the sheen down to a semi-gloss finish. When I next picked up the model a
couple of days later I discovered, quite by accident, a technique for weathering
that looks (to me) quite realistic. In holding the kit by the wings, I
noticed that my skin oils would vary the level of sheen on the finish and by
literally rubbing my thumb and fingers over different areas of the plane I could
vary the reflective qualities quite dramatically, to show heavily trafficked
areas on the wings for example. This is not so visible in the photographs,
but give it a try, if you don't like the result, it's easy to fix.
Weathering and Conclusion
As is normal for me, weathering is
done with pastels. I applied a few paint chips around the gun hatches on
the wings and the engine cowls, but kept it to a minimum. Using various
shades of pastel I highlighted and scuffed areas of the plane according to
traffic and exposure to the elements. I added all the small and breakable
bits, used stretched sprue for the antenna wire and attached it with white
glue.
I really enjoyed this kit. It
was the first of the four Essex aircraft and it was during its construction I
got the idea to complete the Air Group. I highly recommend it to any but
the most inexperienced modeler.
Navigation to Additional Parts
|
Click the links below to go to the additional Parts of the Reference Feature,
"USS ESSEX (CV-9)
and AVG-83":
Part One - USS Essex History
Part Two - VF-83 Grumman F6F-5 Hellcat
Part Three - VBF-83 Chance Vought F4U-1D
Corsair
Part Four - VT-83 Grumman TBM-3 Avenger
Part Five - VB-83 Curtiss SB2C-4
Helldiver
Text Copyright © 2002 by
Mark Beckwith
Images Copyright © 2002 by Mark Beckwith and Official Sources
as noted
Page Created 06 June, 2002
Last Updated
19 April, 2004
Back to Reference Library
|
 Home |
What's New |
Features |
Gallery |
Reviews |
Reference |
Forum |
Search
Home |
What's New |
Features |
Gallery |
Reviews |
Reference |
Forum |
Search