Woodgrain Painting Technique
by Eric Larson
|
Painted Woodgrain Texture |

HyperScale is proudly supported by Squadron
Since I started posting work in progress photos of my Wingnut LVG back in 2009, I have received numerous queries here, and from other forums, as to how I did the woodgrain. I've tried to describe it as best I could in words but have decided that a little demo, with more pictures, would be better.
Please note that this little tutorial/demo is in no way meant to be the definitive guide to woodgrain painting. It is merely an attempt to share what I managed to achieve on my LVG. To those who are just curious as to how I did it, I hope this answers your questions. To those who want to attempt it themselves, I hope I provide enough information, and encouragement, to help you get started and develop your own technique.
First, a little background. The LVG is only the second WWI model I've built (not counting those as a kid), and the second model in general where I've had to do any significant woodgrain effect. The first time I needed to simulate bare wood was when I built Eduard's 1/48 Ki 115 a couple years ago. The cockpit of the real aircraft is primarily plywood so I needed to represent that on the model. I searched for and read as many articles as I could find on simulating woodgrain. There are plenty out there in various modeling forums and build articles for WWI aircraft as well as model railroading. The majority of them described the use of artist's oil paints so that is the medium I chose and it worked quite well for the little Ki 115.
Enter the Wingnut LVG. LOTS of woodgrain! The kit instructions include a full page, in color, devoted to painting the woodgrain. This info is also available on their web site under the LVG's Hints and Tips section. They also suggest the use of oil paints so with that, combined with my limited previous experience, I was fairly confident that I could pull it off.
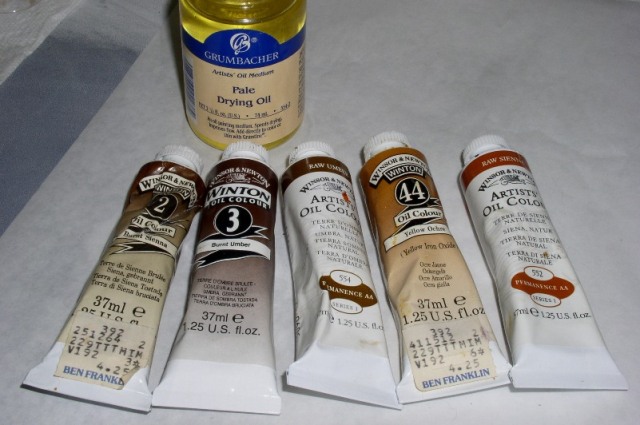
The Wingnut instructions show only Burnt Umber as the color of oil paint to use but based on what I learned from the other articles I've read, I use a combination of five colors: Burnt Umber, Raw Umber, Burnt Sienna, Raw Sienna, and Yellow Ochre. Note also the bottle of Pale Drying Oil. This can be added to the paint to speed up the drying time. Japan Dryer is another additive that will do the same.
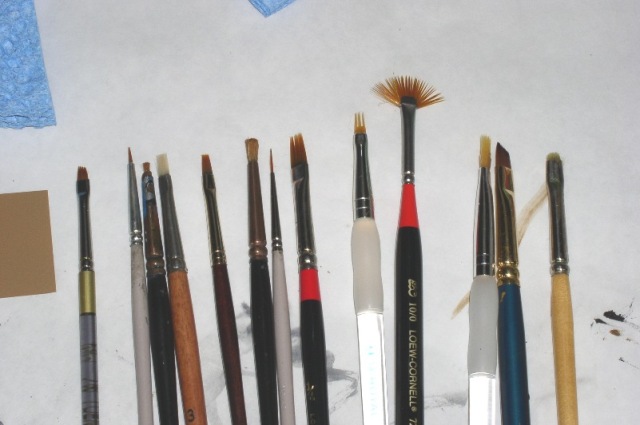
I have accumulated a wide variety of brushes for "wood working". Some are better for wide, flat, areas, such as the fuselage sides, and others for small or narrow areas, such as the cockpit framework and propeller. Seen here is my selection of those bushes. Some are old ones with the bristles trimmed down to nubs while others are ones I found while browsing the local craft and art supply shops.
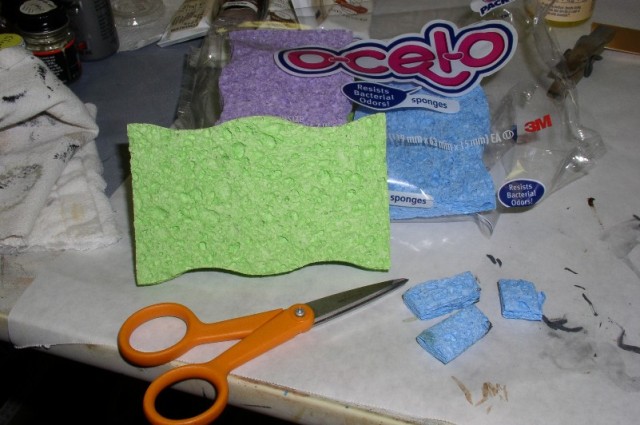
Oh, another thing needed are little chunks of sponge (again, per the Wingnut instructions). Just plain old cleaning sponges (found mine at Walmart) cut into pieces as seen here.
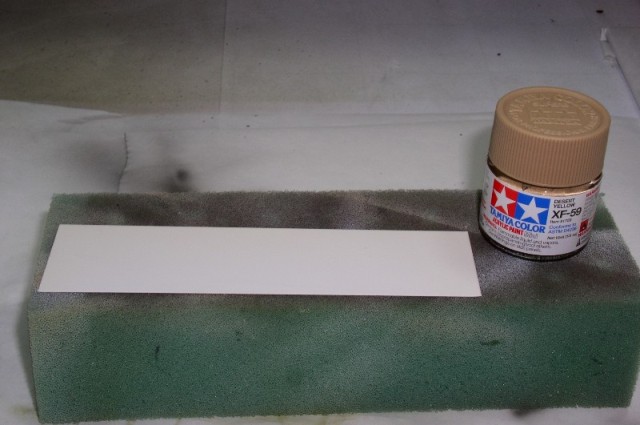
OK, let's get started. For this demo, I'm using a piece of white sheet styrene. The base color will be the same as I used on the LVG (and suggested by Wingnut), Tamiya XF-59 Desert Yellow. On my model I varied the shade, between sections of the fuselage exterior, by adding some XF-2 Flat White to the XF-59 in some areas, and also painting a few areas in XF-60 Dark Yellow. This was done in an attempt to give some variety to the finished look of the wood.
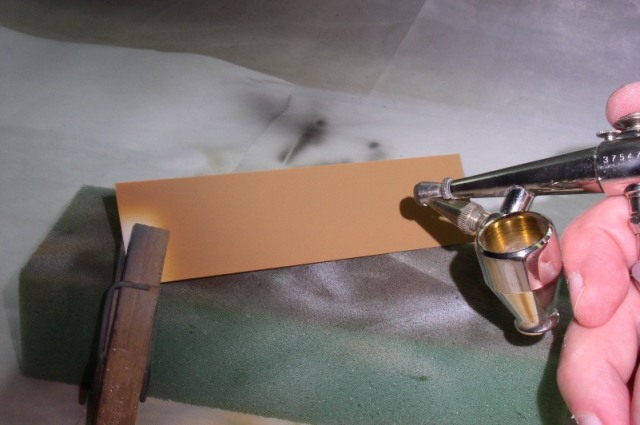
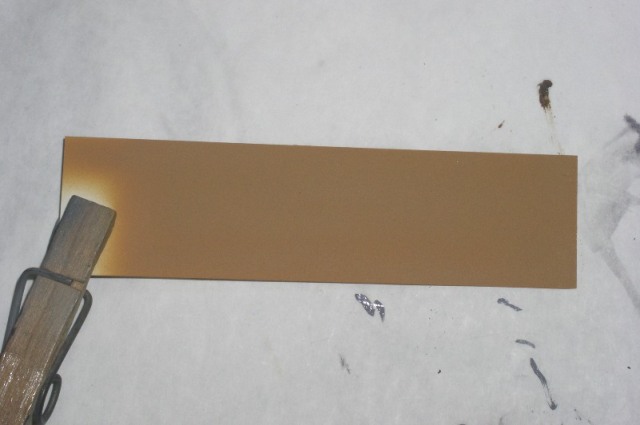
First, I sprayed on a couple coats of the XF-59 base color using my trusty old Paasche H (the best airbrush there is for laying down solid coats of paint!). For this use, I thin my Tamiya paint about 50/50 with PPG's DTL 876 Acrylic Lacquer Thinner. This causes it to dry fairly quickly and makes for a tougher finish than when thinned with Tamiya's thinner. I've heard that Tamiya paint finishes tend to be delicate but about 30 minutes after I painted this test piece I tried scratching it with my fingernail. All I got were some shiny spots on the paint. I had to really gouge at it to remove any paint. Even at that, I allow the base color to cure overnight before applying the oil paints.
Now it's time for the fun part. I squeeze out a small amount of each of the oil paint colors onto a palette, which in my case is just scrap of aluminum foil placed on a plastic lid. I also put a few drops of the Drying Oil in the corner of the foil, or another little container, so I can mix tiny amounts in with the paint as I'm working. The Drying Oil will thin the paint so you want to use it sparingly.

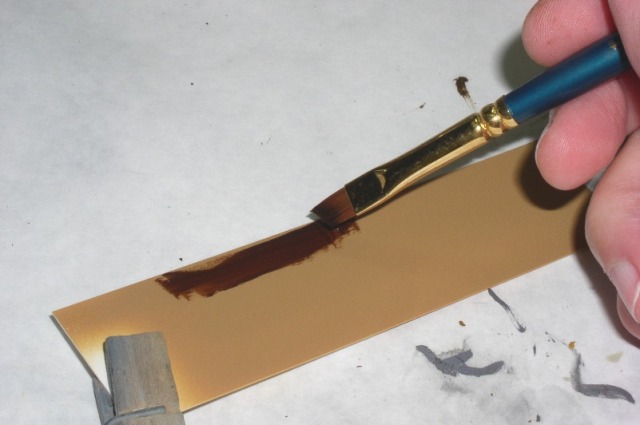
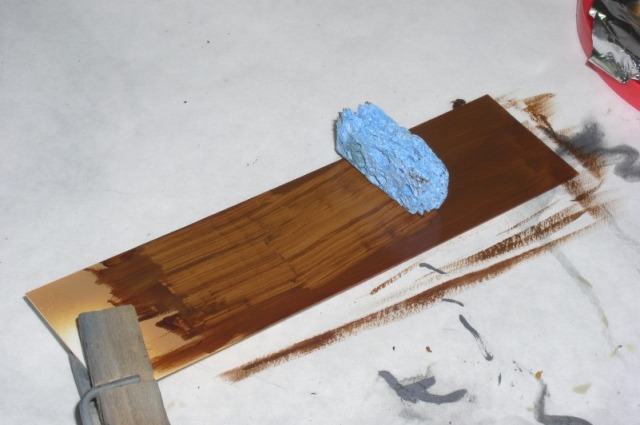
Next, using one of the wide brushes, I lay down a thick layer of the darkest color (Burnt Umber). It doesn’t have to be perfect, just a good, thick, even coverage.

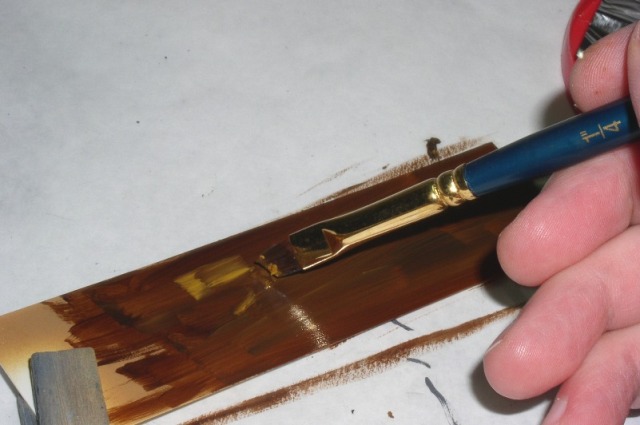
Then I pick up brush loads of the other colors and blend them into the Burnt Umber to get some subtle variations in the shade.

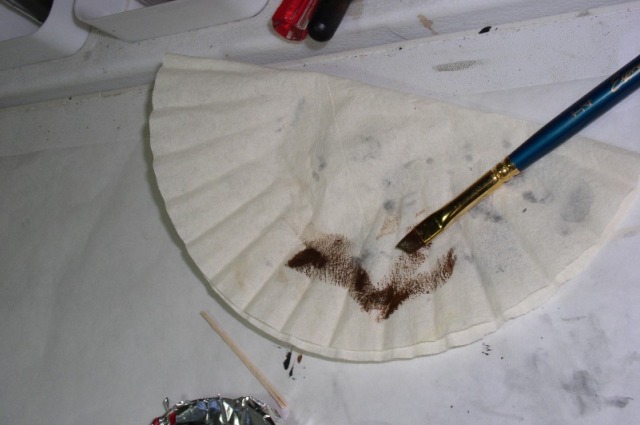
Let me pause here for a moment to mention something. In between steps and while doing the final grain work, I will often wipe off the brushes on a folded coffee filter. They are lint-free and very absorbent. Perfect for wiping off paint brushes. Also, my paint table and spray booth are covered with white Reynolds Freezer paper. This stuff is great as it is plastic coated lint-free paper. I lay it down with the plastic side facing the table. This allows the upper paper surface to absorb paint and thinner while the plastic prevents it from soaking through to the table.
OK, now time for the sponge chunks. I take a piece and gently wipe off the excess paint in the direction that I want the grain to go. It may take several passes to get an even look. Wipe off the sponge on the trusty coffee filter every couple of swipes. If I think I've removed too much paint, I just brush on more and start again. The nice thing about oils is their lengthy work time and they will not attack the Tamiya base coat.
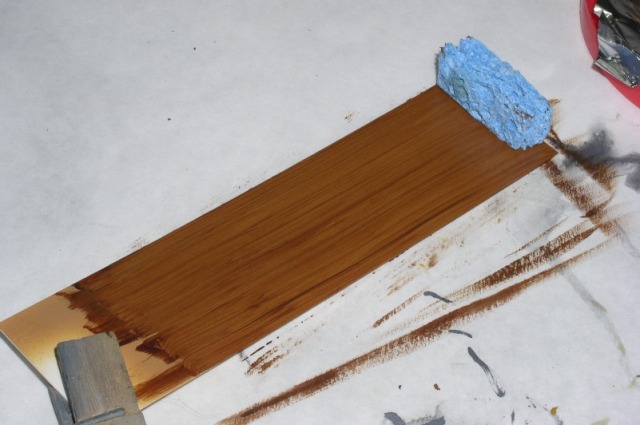
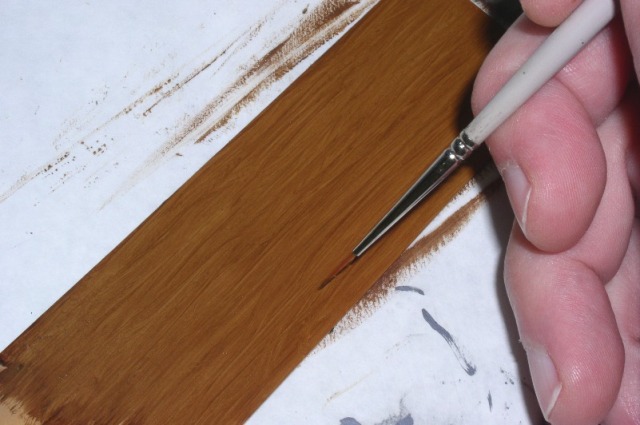
Next, I take a wide "rake" brush and gently do the same thing I did with the sponge. This step takes the remaining paint and gives the finer, more even lines I want for my grain.
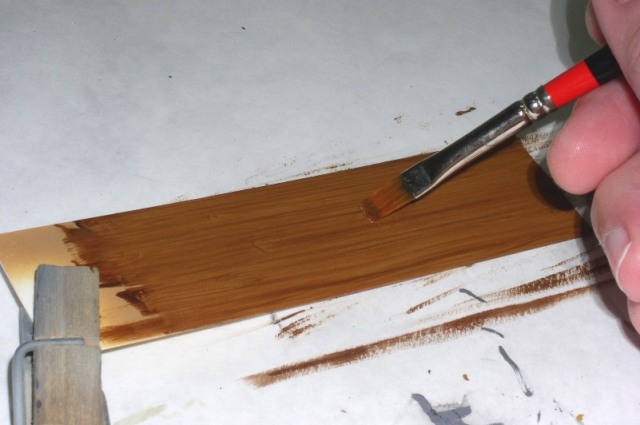
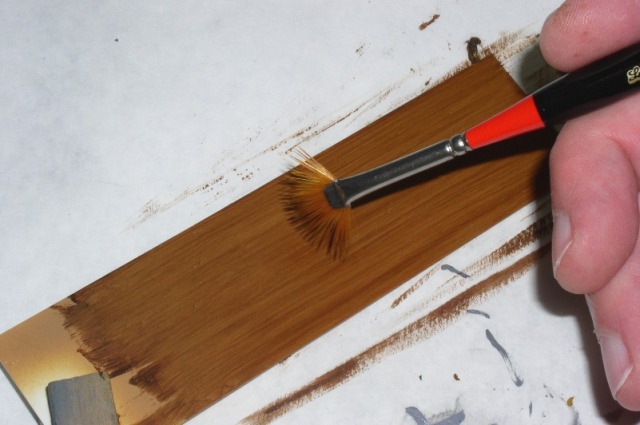
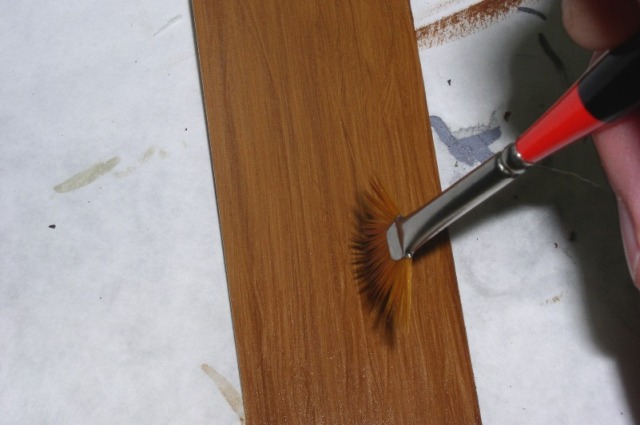
Now, for the real key to my whole process – the fan brush! Again, like with the sponge and rake brush, I first run it gently along the area with the wide area of the brush perpendicular to the grain. This is just one more level of refining the grain lines. At this point, the grain lines, formed by the oil paint, will all be roughly parallel. I then rotate the fan brush roughly 90 degrees so the wide area is now parallel to the grain lines (see photos below). This is where patience and finesse comes in. By just using the very tips of the bristles, moving back and forth along the grain lines in random motions, I create the swirls and waves that are seen in real woodgrain.
Did you ever finger-paint as a child - creating patterns in thick paint with your fingers? That is what I compare this to, but at a much finer level, with the tips of the fan brush bristles acting as the fingers.
I might also want to add a knot or two to the wood and for that I use a fine "spotter" brush.
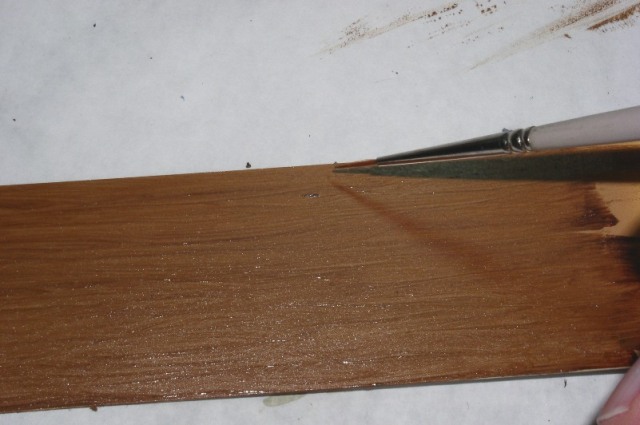
And there you have it…wood!

What I just described, with the exception of airbrushing the base coat, which I did last night, took me about 10 minutes this morning!
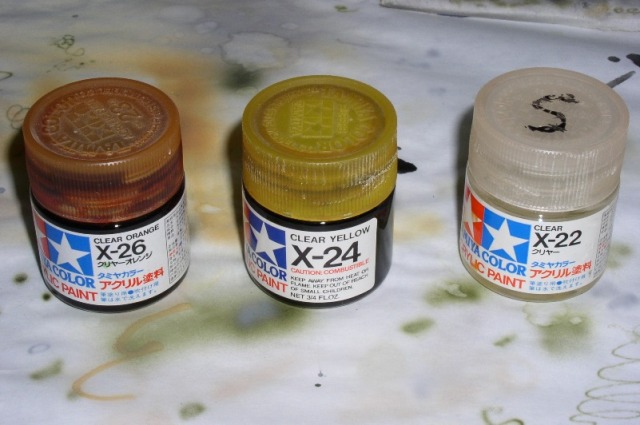
When working on the model, I put the finished pieces under some kind of cover to protect them from dust as it can take several days for the oil paints to cure. I usually wait a week to be safe. For the LVG, once I knew the oil paint was dry, I gave the wood areas a thin coat of a 50/50 mix of Tamiya Clear Orange and Clear Yellow to give it a pale orange varnished look. This was followed by coats of regular Tamiya Clear before and after the decals are applied. The multiple coats of clear along with the slight texture causes by the lines of oil paint give depth to the final look.
A couple of final notes. One of the biggest frustrations I encounter doing this is the battle against lint and dust. No matter how careful, during the process, one is bound to pick up a some lint, dust specs, or hair on the paint brush which then finds its way into the paint. I keep a pair of fine pointed tweezers handy to pick out any such intruder. Sometimes, the paint finish is disturbed which require additional work to repair.
Note that the finished "wood" in my demo is on the dark side. By using different base coats and changing which color of oil paints are used, one can simulate different kinds of wood. For a lighter wood, like on an Albatross, I'd try a base coat of white or very pale yellow, then for the grain, I'd avoid the darker Umbers and use primarily the Siennas and Yellow Ochre. Of course, plenty of experimenting on an old model is highly recommended!
Well, that pretty much wraps up my little demo. I hope you found it useful. I would be happy to answer any further questions or expound in greater detail on any of the steps.
I would love to hear from anyone who gives this a try!
Image and Text Copyright ©
2010 by Eric Larson
Page Created 25 February, 2010
Last Updated
25 February, 2010
Back to HyperScale Main Page

|
 Home
| What's New | Features | Gallery | Reviews | Reference | Resource Guides | Forum |
Home
| What's New | Features | Gallery | Reviews | Reference | Resource Guides | Forum |