|
Painting Bases
for Aircraft and
Vehicle Models
by Brett Green
Part One

Just Plane Stuff Bases are available online from
Squadron.com
A scenic base can enhance a model aircraft or vehicle. It has the
potential to add context to the model by displaying the subject in its
historical environment.
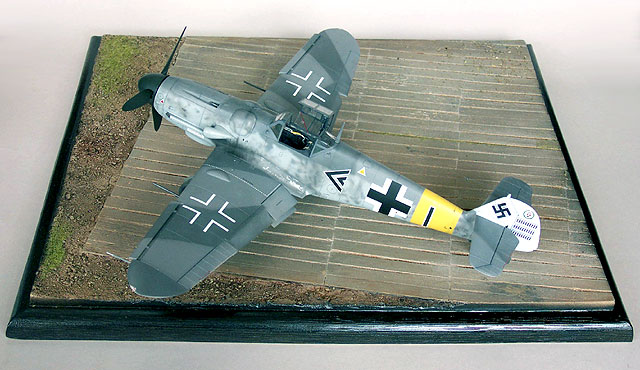
The photograph below shows my Hasegawa 1/32 scale Messerschmitt Bf
109G-6 displayed on a resin base representing a typical Luftwaffe
hardstand.
Modellers may choose to build their own bases from wood and
landscaping materials. However, a good range of pre-fabricated bases
are also available for different eras, countries and theatres of
operation. These bases are available in injection styrene, vacuum
formed plastic, resin or plaster.
An authentic paint job is essential for these pre-fabricated bases.
Painting
Bases - Step by Step
|
I have have tried a number of different methods for painting bases.
The "best" method is very much a matter of personal taste.
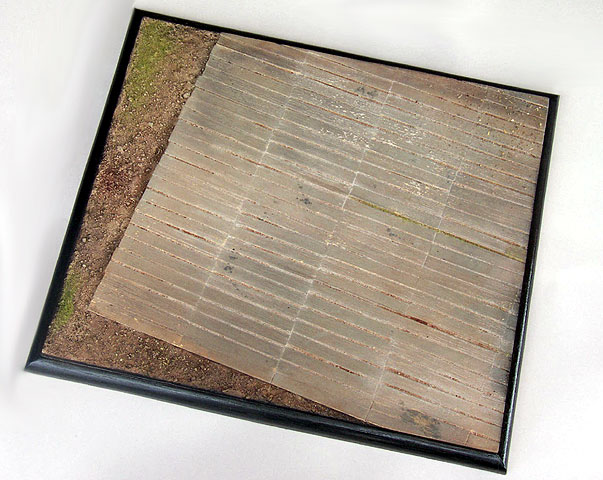
When painting a pre-fabricated base in resin, styrene or plaster, I
generally follow a five-step process. In the following example I am
painting the Just Plane Stuff 1/32 scale resin Luftwaffe Hardstand
base:
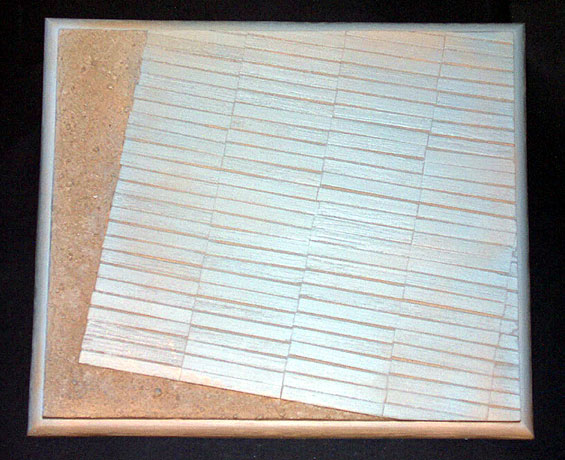
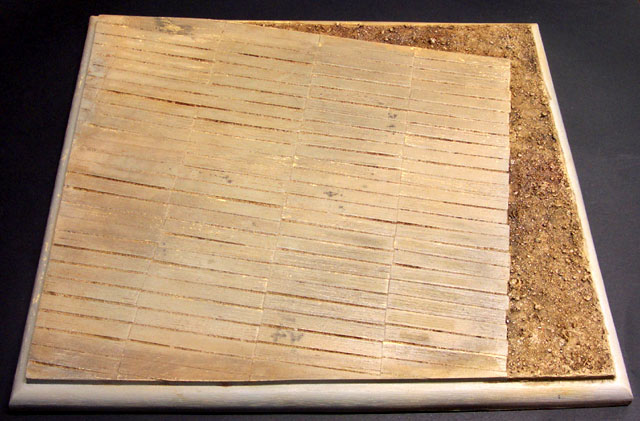
Step 1: Base Colours
In this example, my first step was to spray the resin in two base
colours. I wanted to depict the groundwork as dry and parched; with
the planks a washed-out and weathered grey. An aerosol spray was used
to apply a primer coat of grey. This was roughly masked by holding the
side of a cardboard sheet against the edge of the hardstand itself,
then the groundwork was sprayed tan.
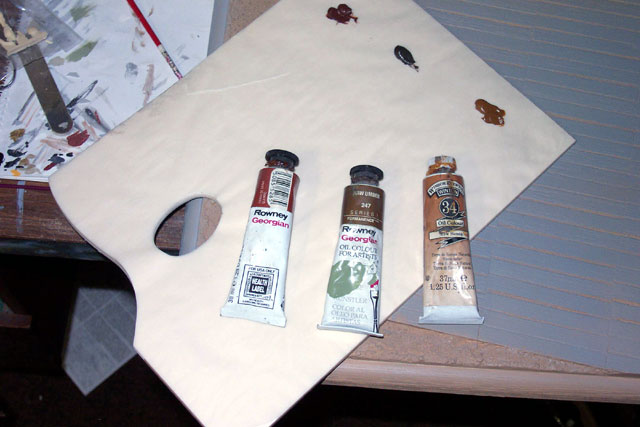
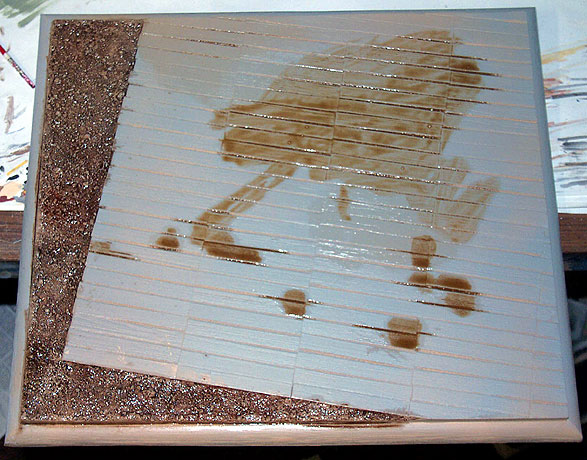
Step 2: Oil Wash
Oil paints were then assembled for the next phase. I like to blend
a mixture of oil paints for weathering groundwork, and I use a
disposable greaseproof paper palette for this task A small smudge of
Raw Umber, Burnt Sienna and Gold Ochre are squeezed onto the palette
and mixed according to taste.
A dark brown mixture of the thinned oil paint was slopped onto the
groundwork, and a paler mix was brushed onto the hardstand planks.
This was blended in with a further wash of almost pure thinners.
The wash was then spread evenly across the base. For me, the
hardest part of this job is to walk away and leave the wet oil wash
alone!
After the wash was on the base overnight, I wiped the excess off
the planks; first with a soft cloth, then by spreading the remaining
thinned oil paint with my fingertip.
As an alternative, acrylic paints can be used as a wash. However,
the drying time of acrylic paint is much faster than oils, so the
spreading must be done within minutes of applying the wash to the
base.
Step 3: Sealing and Detailing
Now it was time to seal the finish. I applied heat from a hair
dryer (my last remaining use for this household device), then sprayed
on a coat of Aeromaster Flat.
When the flat finish was dry, I applied spots of thinned Black oil
paint, spattered from the brush onto the groundwork to represent oil
stains. I also smeared some black acrylic paint selectively over the
hardstand to depict hard use and fading of the timber. Further
weathering was added by running a coarse sanding stick over the top of
the planks, revealing the light tan resin beneath. This seemed to be a
good representation of fresh timber under splinters and damage.
Step 4: Painting the Frame
The next task was to spray the "timber" frame. I decided to paint
this border gloss black as a contrast to the dry, earthy tones of the
base.
Step 5: Additional Landscaping
Finally, I applied pressure-sensitive spray adhesive (available in
an aerosol can at any craft shop) to patches of the groundwork and the
planks. To avoid getting glue on the glossy frame, I used a piece of
cardboard with irregular shaped holes to mask the application of the
aerosol adhesive With the masks still in place, I sprinkled a generous
quantity of static railway grass on top of the adhesive patches. The
mask was then lifted and I briskly blew across the grass to remove the
excess.
I added leaf-litter to another section of groundwork and to the
corner of the hardstand. The common kitchen herb, Basil, was used to
represent the leaf litter. This costs about 1/10th of the price of a
Hudson and Allen landscaping product, is quite convincing and smells
good! Once again, I used the aerosol adhesive to secure the leaf
litter.
There are many ways to paint a scenic display base. This five-step
method is just one of the possibilities.
As with so many aspects of our hobby, the best approach is to
practise a few new ideas and adapt them to your personal preferences.
Enjoy!
Text and Images Copyright © 2002 by
Brett Green
Page Created 03 June, 2002
Last updated
03 June, 2002
Back to
HyperScale Main Page
Back to
Reviews Page |
 Home |
What's New |
Features |
Gallery |
Reviews |
Reference |
Forum |
Search
Home |
What's New |
Features |
Gallery |
Reviews |
Reference |
Forum |
Search