|
Operation Falconer
RAAF F/A-18 Hornets
Part One - Operations &
Modelling
by Ken Bowes
|
 |
|
RAAF F/A-18A Hornet (Upgraded)
A21-20 77 Sqn RAAF
Middle East Area of Operations |

HyperScale is proudly supported by Squadron
Operation Bastille
On February 7th 2003 the Australian Government announced the forward
deployment of Royal Australian Air Force (RAAF) units to the Middle East Area of
Operations (MEAO). This deployment was to be part of Operation Bastille, the
announcement coming after that of the deployment of a Special Forces Task Group
and Navy ships on the same operation. The objective of Op Bastille was to ensure
that the Australian Defence Force (ADF) was given the best possible opportunity
to prepare for the possibility of conflict in the event that a diplomatic
solution could not be found. The deployments were also designed to support the
United Nations disarmament process by contributing to pressure on Iraq to comply
with its international obligations to end its program of weapons of mass
destruction.
The RAAF elements committed to Op Bastille included a squadron of 14 F/A-18A
Hornet aircraft. The Hornet squadron, drawn largely from 75SQN, were farewelled
from RAAF Base Tindal on the 8th. The RAAF unit arrived at its deployment base
in the MEAO between the 10th and 16th of February, from which time they
commenced training operations to assist familiarisation with the operational
environment.
Operation Falconer
Diplomatic efforts to convince the Iraqi Regime to comply with UN resolutions
ultimately failed and as a result the Coalition launched Operation Iraqi Freedom
on 19/20 March 2003 with a missile strike on key facilities in Baghdad, widely
reported as targeting Saddam Hussein himself. The commitment of ADF units to
Coalition operations against Iraq, as announced by the Prime Minister was given
the name Operation Falconer. The Hornet Squadron immediately commenced
operations, with both making significant contributions to the Coalition effort.
The use of RAAF fighters in Operation Falconer was of particular historical
significance. 75 Squadrons combat air patrols into Iraqi airspace marked first
time that an RAAF fighter squadron had conducted offensive combat operations
since 77 Squadron deployed to South Korea with its P-51 Mustangs in 1950*. There
was an even deeper historic connection to the MEAO as RAAF pilots renewed
acquaintance with towns such as Basrah and Al Kut, familiar to the aircrew of
Mesopotamian Half-flight which had operated through the same region between May
and August 1915 in the very first overseas deployment of Australian combat
aircraft. Much of the terrain that had been reconnoitred by the Half-Flight
during the early Middle-East Campaigns of WWI was to become the principal
operating area of the RAAF Hornet squadron 88 years later.
(* There have of course been other deployments of RAAF fighter squadrons in the
period since 1953. 78WG (75 and 76 Sqns) deployed to Malta in the 1950s, whilst
79 Sqn operated from Ubon, defending North-East Thailand under a SEATO
commitment from 1962 to 1968. More recently 3 and 77 Squadrons deployed to Diego
Garcia under Operation Slipper, the Australian contribution to the War on
Terror. The defining aspect of these deployments was their defensive nature.)
The types of missions undertaken by the RAAF Hornets between 20 March and 2
May 2003 ranged from defensive counter-air (DCA) to close air support (CAS), and
strike. The full multi-role capability of the F/A-18 was exploited, with
aircraft on DCA sorties being armed for both air to air and air to ground
missions, whilst those on CAS or strike missions carried sufficient air to air
weapons to deal with any latent threat from the Iraqi Air Force. This allowed
the aircraft to respond to a wide range of tasks, including defending against
hostile fighters or striking a target of opportunity on the ground. Missions
such as these could last several hours and involve multiple refuellings. A
typical weapons loadout used for a DCA mission over Iraq would be 2 x AIM-9
Sidewinders, 3 x AIM-120 AMRAAMs, 1 x GBU-12 500lb Laser Guided Bomb, an AAS-38
Nighthawk FLIR pod and 3 x external fuel tanks.
The first bomb to be dropped in combat by an RAAF aircraft since 2 Squadron
Canberras ended their Vietnam War operations in 1972 was delivered on 22 March
2003 onto a time-sensitive military target. * The aircraft to which the honour
fell was F/A-18 A21-22. This aircraft was a 75 SQN airframe with the older style
of black squadron markings and full colour RAAF roundels. At the time of this
mission it was configured with the standard DCA weapons load mentioned above.
(* The last time an RAAF fighter aircraft dropped ordnance in anger was during
Operations Firedog One and Two in August 1959 and June 1960 respectively. 78 WG
Sabres (3 and 77 Sqns at this time) attacked suspected Communist Terrorist
positions in Northern Malaya during the Malayan Emergency whilst based at
Butterworth).
A number of pre-planned strike missions were flown during Operation Falconer in
conjunction with the DCA effort. The targets of these strikes included the Iraqi
10th Armoured Division Headquarters and a regional Iraqi Intelligence Services
facility. All of these missions were considered successful. Strike aircraft flew
missions in two configurations, these being 2 x AIM-9 Sidewinders, 1 x AIM-120
AMRAAM, 2 x GBU-10 2000lb or 2 x GBU-12 500lb Laser Guided Bombs, an AAS-38
Nighthawk FLIR pod and 3 x external fuel tanks.
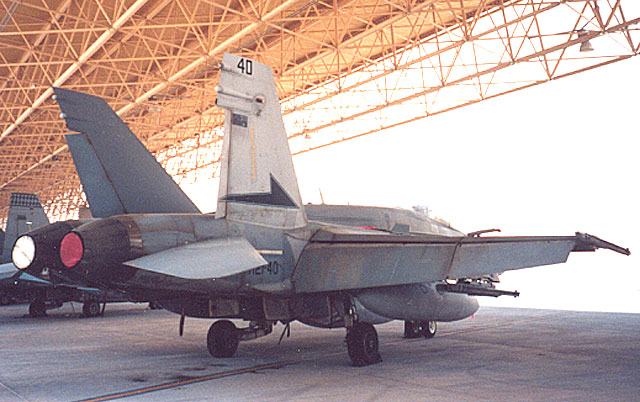
Only three aircraft flew strike missions carrying the GBU-10 as principal
weapon. These were A21-12, 40 and 43. When flying close air support (CAS)
missions, which made up the majority of the missions flown over Iraq, a CAS
configuration was typically used. This was identical to the strike configuration
above but was limited to two GBU-12 LGBs. Modellers should note that these
loadouts apply only to RAAF Hornets and does not reflect the various loadouts
that were carried by US Navy and Marine Hornets during OIF.
By the end of the campaign the Hornet Squadron had acquitted itself well, flying
over 350 sorties and dropping over 120 LGBs. CAS was provided to the 1st Marine
Expeditionary Force, US Army V Corps units and 1st UK Division as they advanced
towards Baghdad. The types of targets struck by the Hornets ranged from tanks to
artillery and airfield infrastructure. These missions were wide ranging covering
Iraq from Al Kut and Al Amarah in the South to Baghdad and Tikrit in the North.
Other areas which received attention from the Hornet Squadron were in the
vicinity of Abinaria Dam, Al Rasheed airfield and Al Assad airfield in Western
Iraq. On 12 April 2003 the F/A-18s were called on to provide close air support
to Australian Special Forces as they moved against objectives at Al Assad. Once
again this was a first as RAAF aircraft directly supported Australian ground
forces, something that had not occurred on operations since the Vietnam War.
Hornet Aircraft Deployed on Op Bastille/Falconer
The fourteen F/A-18 Hornets that were deployed to the MEAO with the Hornet
Squadron were:
A21-12, 14, 19, 20, 22, 23, 27, 37, 38, 40, 43, 49, 52 and 55.
The aircraft deployed were drawn from across the entire RAAF fighter fleet
(A21-1 to 57), all being delivered to the RAAF between 1986 and 1990. The
aircraft had been subjected to Hornet Upgrade Phase 2.1 program and therefore
closely match US Navy and Marine F/A-18A+ aircraft. Features of these aircraft
include the APG-73 radar, avionics and navigation system upgrades. All three
current RAAF fighter squadrons (3, 75 and 77) contributed aircraft and they
remained in their original squadron marking schemes for the deployment. The
major change was the addition of a small dark grey Australian flag in place of
the old full colour fin-flash on all aircraft. The camouflage finish was the
standard RAAF Hornet scheme of FS 35237 uppersurfaces over FS 36375. From
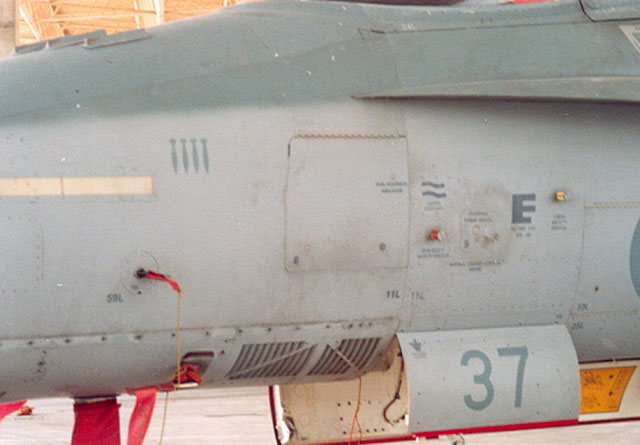
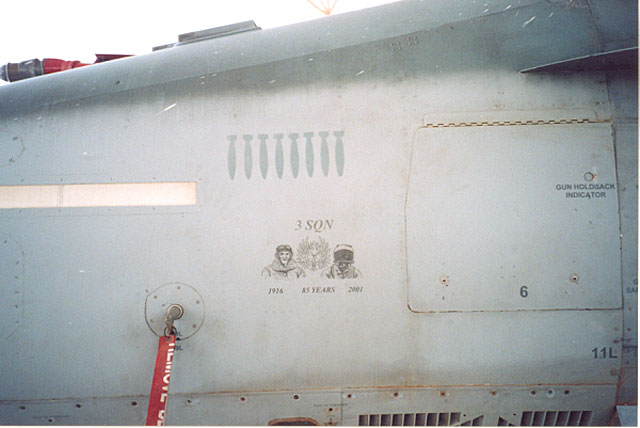
approximately mid-April onwards bomb logs were painted on the upper left hand
side of the nose of individual aircraft denoting missions were ordnance was
released. These logs were still visible on some airframes as late as December
2003 but are gradually disappearing as jets enter the maintenance cycle.
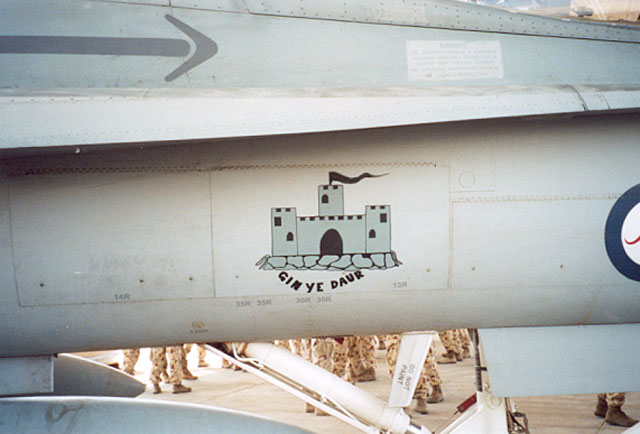
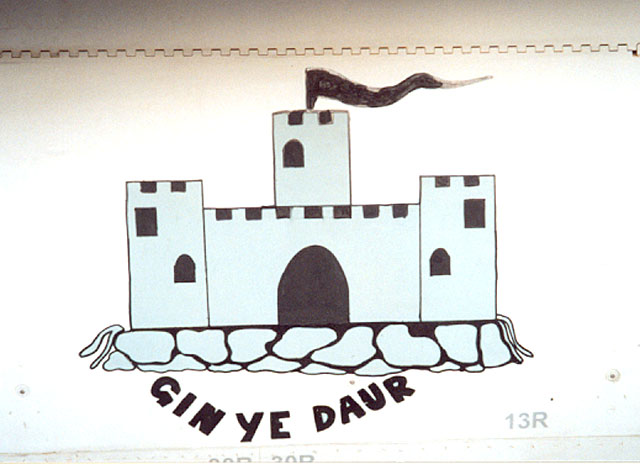
Unlike other Coalition partners, the RAF and USAF, the application of nose art
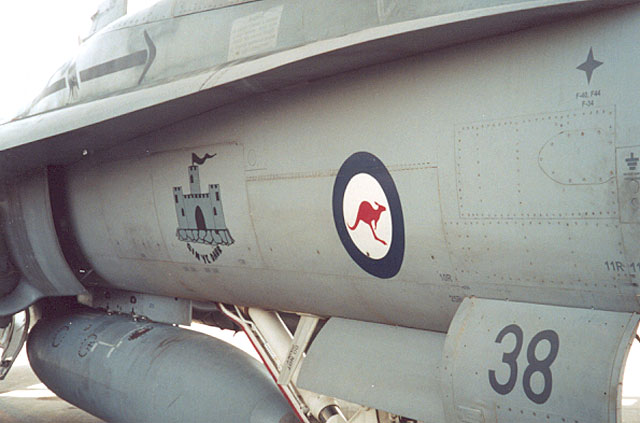
during the campaign was extremely limited on RAAF Hornets. Only one aircraft
received artwork in theatre, A21-38. The artwork was placed on the jet at the
behest of members of No 603 Squadron RAF Reserve who had deployed to the same
operating base. This artwork was derived from the heraldic charge of the
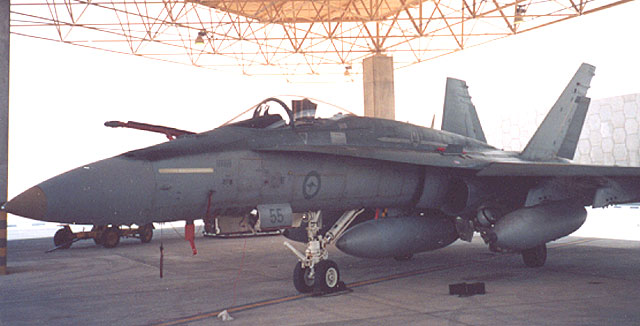
squadron’s badge. The second aircraft, A21-55, bore a small design commemorating
the 85th Anniversary of 3 Squadron. This design dated back to 2001 and was not
applied for the operation.
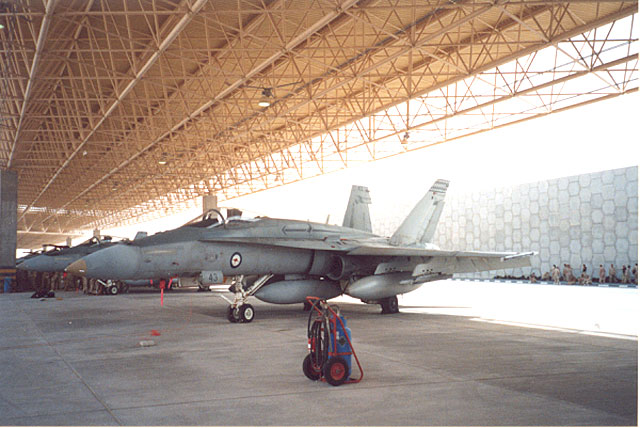
Distinct variations in markings between the RAAF Hornet squadrons are apparent
from photos of the Hornet Squadrons aircraft in the MEAO. 3 Sqn had fully toned
down its aircraft with all markings appearing in lo-viz grays. 77 Sqn had
removed the white from their Squadron colours, leaving the Brunswick Green and
had also adopted lo-viz grey roundels, but left all serial numbers in black,
whilst 75 Sqn toned down their squadron colours and serials (dark grey vice
black) but retained full colour roundels. No aircrew names or other unique
identifying markings were carried on the jets for reasons of operational
security. This practice is in common with USAF units in the theatre.
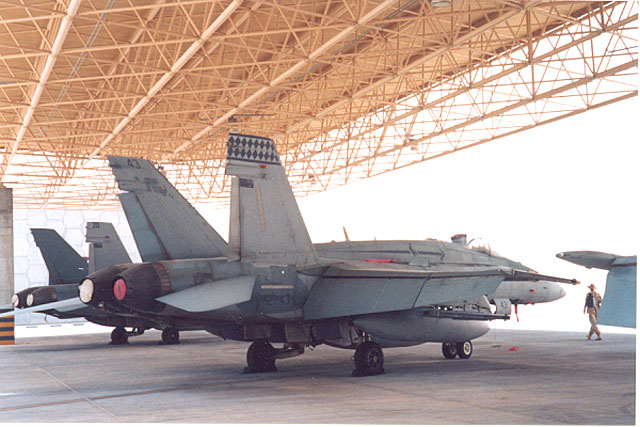
Anomalies existed even between aircraft drawn from the same Squadron. One was
the historically important A21-22, which retained the older full black style
Squadron colours of 75 Sqn. Close examination also shows the direction of the
Magpie varies. 75 Sqn’s Magpie has been applied incorrectly since re-equipping
with F/A-18s in the late 1980s. Heraldry requires an animal to face the
direction of the enemy (or nose of the aircraft). On Hornets this was
interpreted as the head of the bird, but as the bird is looking back over its
shoulder the correct orientation should be chest forward as on A21-20 and
A21-12. This change is being made on the aircraft as they receive repaints. One
zap worth noting was the replacement of the 77 Sqn Oriental Lion with lo-viz
Magpies on A21-20 (this aircraft had also formerly been one of the overall
Gunship Gray colour trials aircraft in the early to mid 1990s).
|
Modelling an Op Falconer Hornet |
The following changes should be made to
any standard A model Hornet kit in order to replicate an Operation Falconer
Hornet:
a.
fitting swept style antennas to the spine and undernose in place of the
previous upright versions;
b.
adding the IFF "bird slicer" antenna on the nose forward of the
windscreen;
c.
adding the GPS antenna dome on the spine; and
d.
adding a dummy catapult bar. This bar is the same length and weight as
the original but is made from square section tapered metal (see the photos) with
none of the necessary parts to engaged the catapult. This mod was designed to
reduce nosewheel shimmy that had plagued the aircraft since it first entered
RAAF service.
The recently released Academy 1/32
F/A-18C kit is the best base kit for such a model, requiring only the
modification of the tail fins to A model standard, application of the RWR
fairings and the addition of the GPS dome on the spine to create an accurate
replica.
|
 |
|
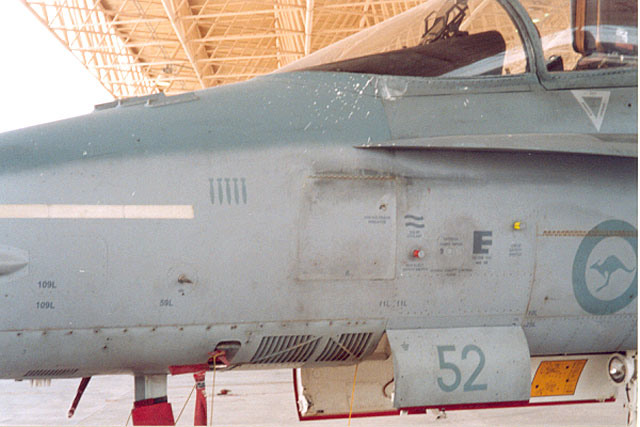
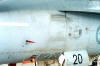
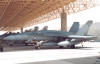
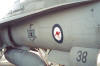
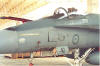
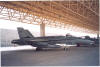
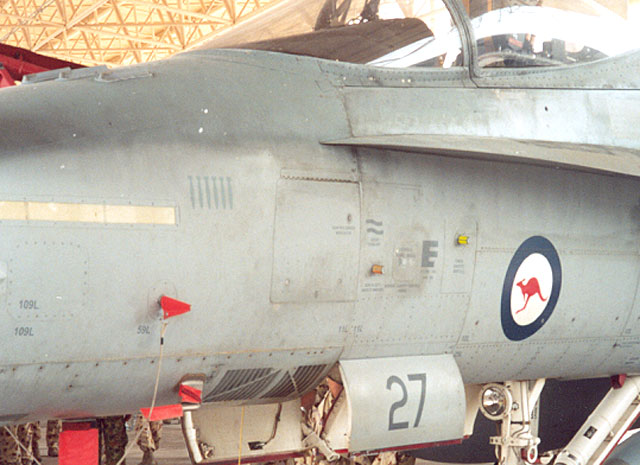
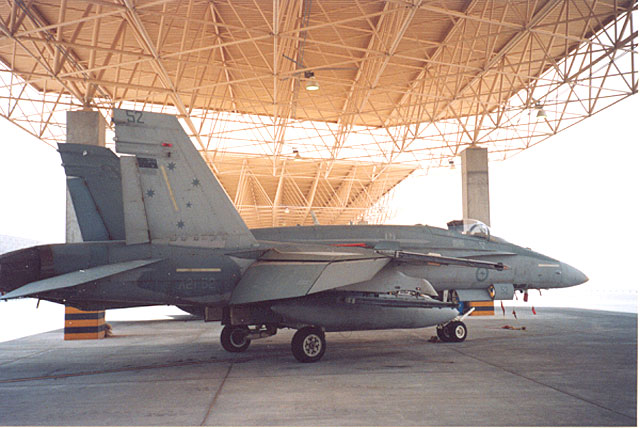
RAAF F/A-18A Hornet (Upgraded);
A21-52 of 3 Sqn RAAF
Note the IFF "bird slicer" antenna on the nose forward of the windscreen,
the bomb log painted on the nose and the generally heavy weathering. |
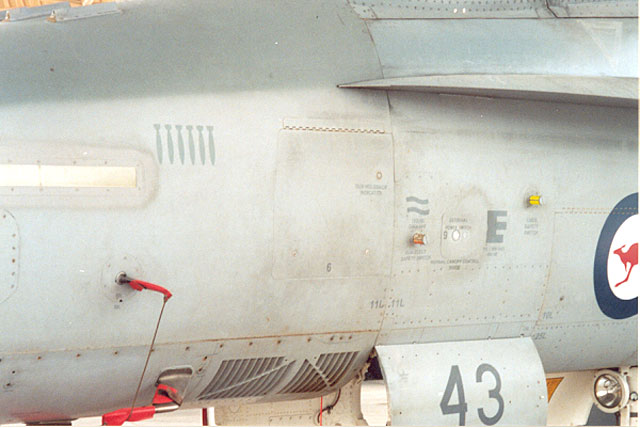
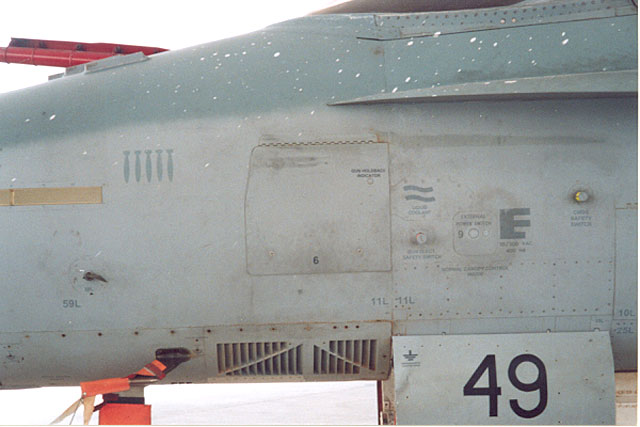
Aside from the external differences
between the standard A model Hornet and an upgraded Australian aircraft, the
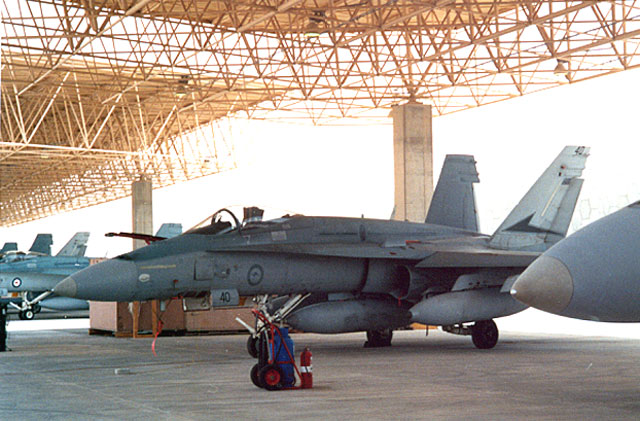
following is worth noting. The aircraft spent much of their time in the open at
their deployed location, being exposed to several fierce dust storms. Coupled
with a high rate of effort (12 sorties per day) this resulted in some quite
heavy weathering over the entire airframe. Another point worth noting was that
during the HUG Phase 2.1 upgrade the fitting of the IFF antenna saw the modified
area receive fresh paint whilst the rest of the airframe remained sometimes
quite dirty and faded as shown in the following images:
http://www.defence.gov.au/gallery/large/000155678_42.jpg
http://www.defence.gov.au/gallery/large/000155678_29.jpg
This nose dis-colouration is very obvious and was even still apparent on the
heavily weathered Falconer aircraft.
|
 |
|
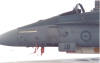
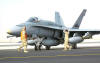
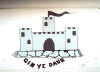
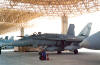
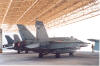
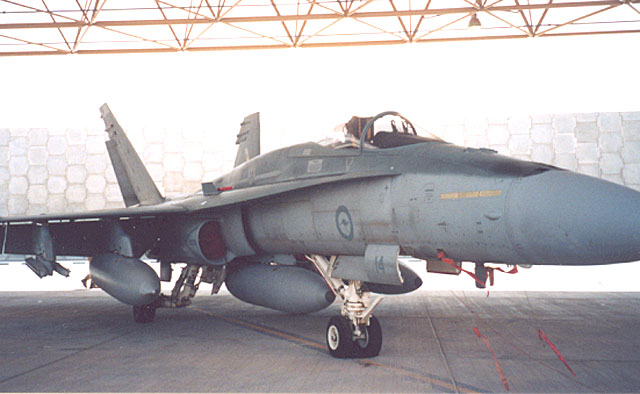
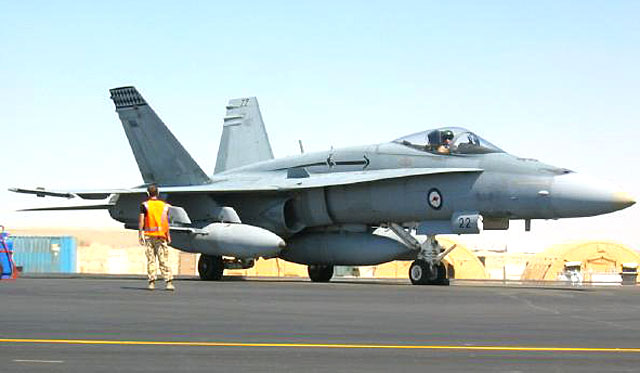
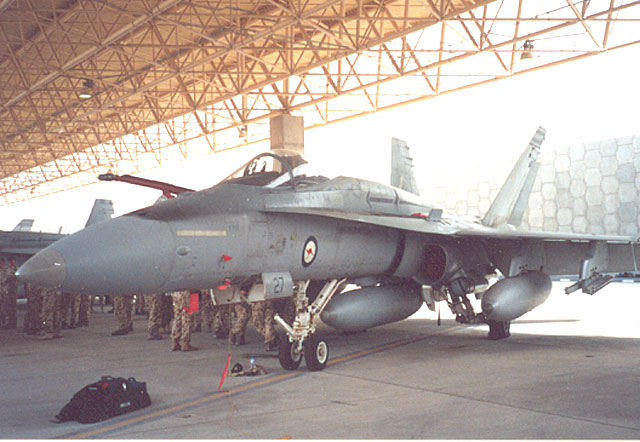
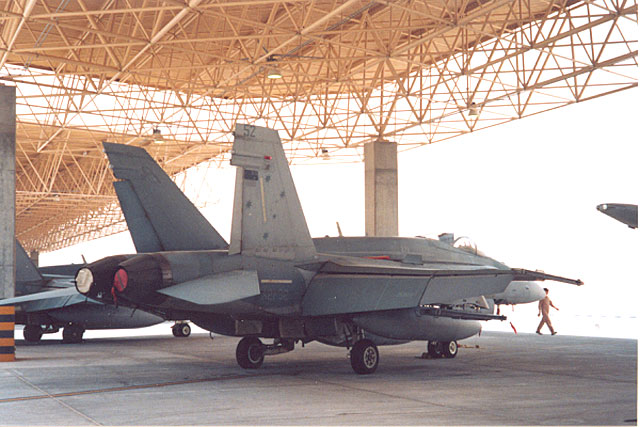
RAAF F/A-18A Hornet (Upgraded);
A21-38 of 75 Sqn RAAF
exhibiting its unique nose art |
|
 |
|
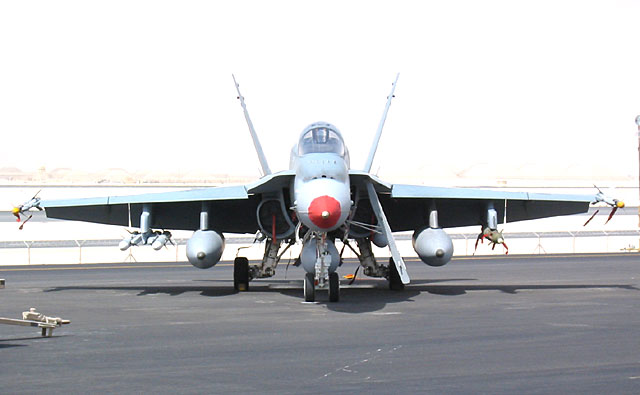
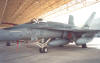
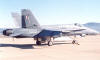
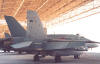
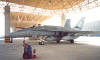
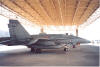
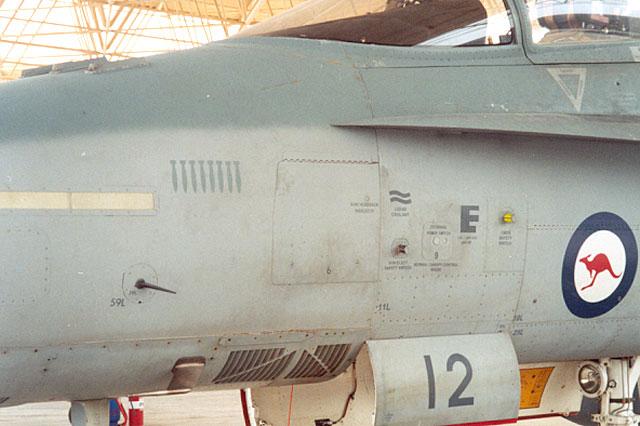
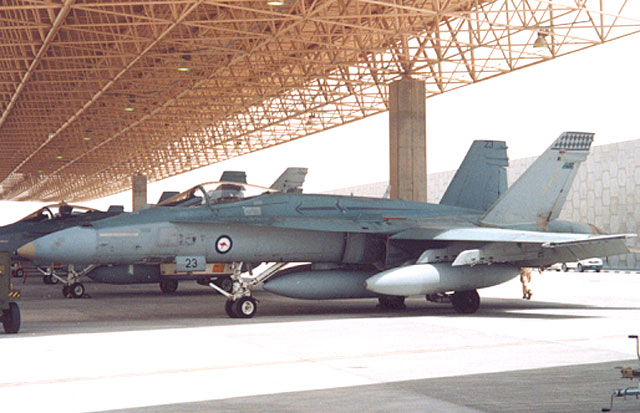
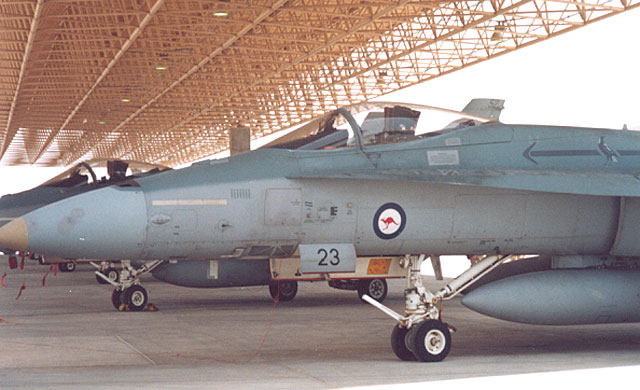
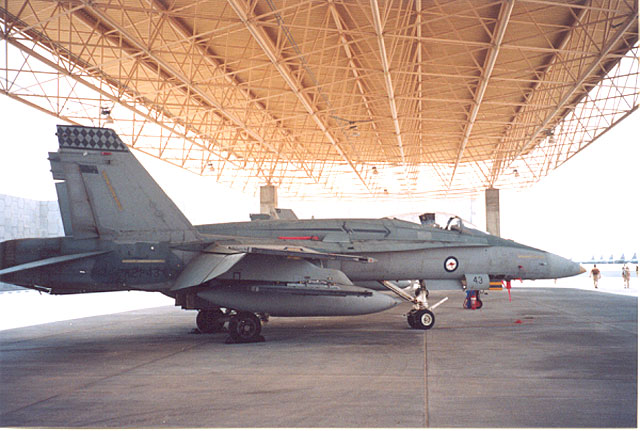
RAAF F/A-18A Hornet (Upgraded);
A21-12 of 75 Sqn RAAF displaying its hi-viz roundels |
|
 |
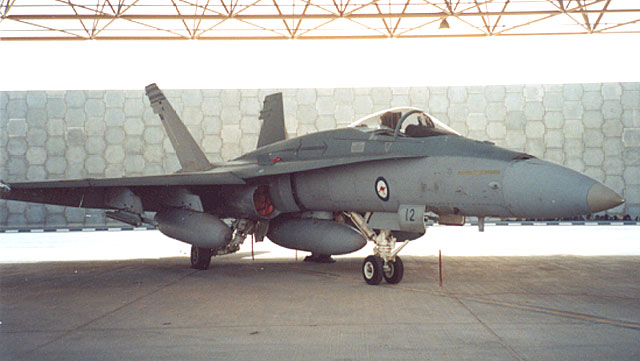
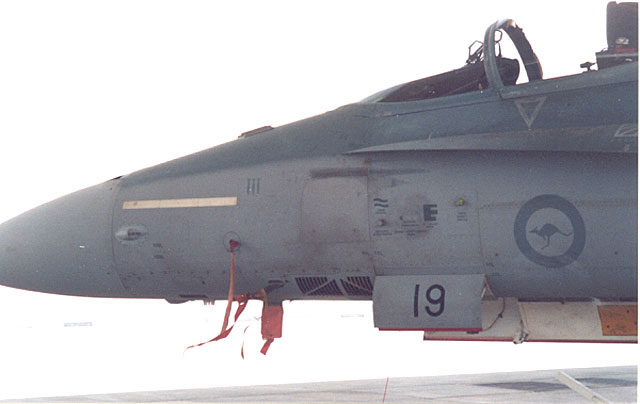
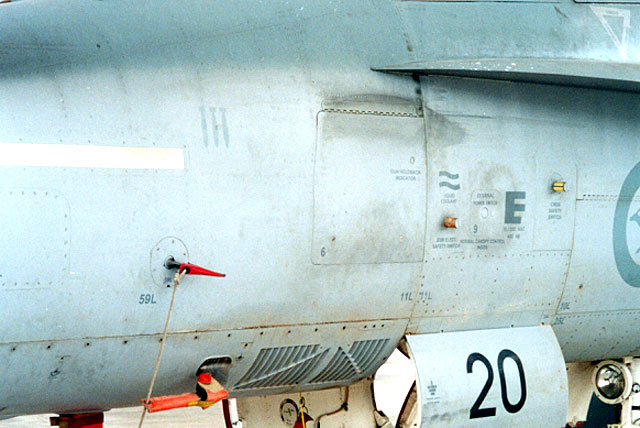
|
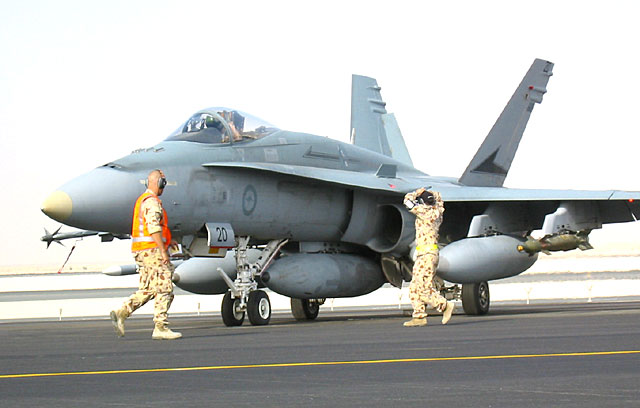
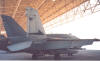
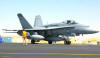
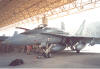
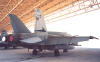
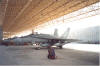
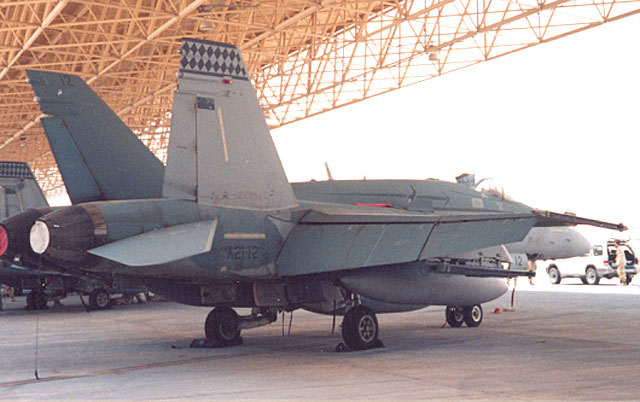
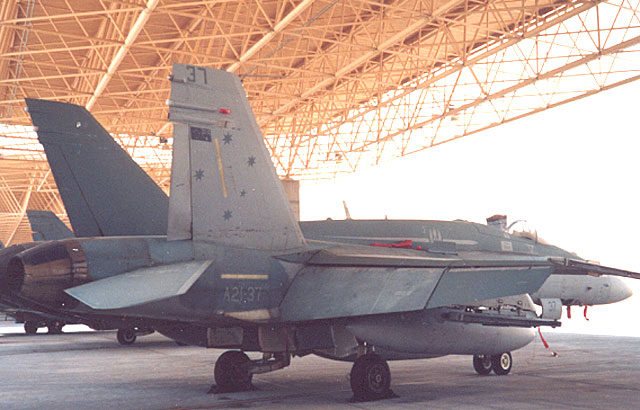
RAAF F/A-18A Hornet (Upgraded);
A21-20 of 77 Sqn RAAF.
This aircraft has been "zapped". The 77 Sqn "Grumpy Monkey" has been
painted out and replaced with the 75 Sqn backwards-facing Magpie. This
view also shows the swept-style antenna on the spine. A full view of this
aircraft is shown in the title image. |
Click the thumbnails below to view
larger images:
|
|
|
|
A21-12 bomb log
|
|
|
|
A21-12 bomb log
|
|

|
|
A21-12
|
|
|
|
A21-14
|
|
|
|
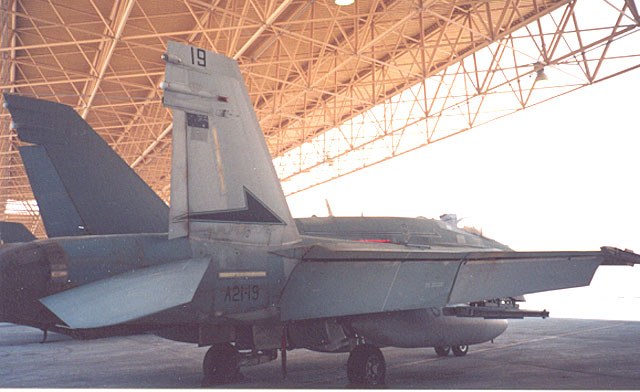
A21-19
|
|
|
|
|
|
A21-19 bomb log
|
|
|
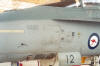
|
A21-20
|
|
|
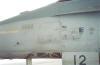
|
A21-20 bomb log
|
|
|
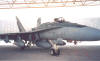
|
A21-20 on the flightline
|
|
|
|
A21-20 in its earlier colours
|
|
|
|

|
|
A21-20 in its earlier colours
|
|

|
|
A21-20 zapped on both sides of the spine
|
|
|
|
A21-22
|
|
|
|
A21-23
|
|

|
|
A21-23
|
|
|
|

|
|
A21-23 bomb log
|
|
|
|
A21-27
|
|

|
|
A21-27 bomb log
|
|
|
|
A21-37
|
|

|
|
A21-37 bomb log
|
|
|
|
|
|
A21-38 nose art
|
|
|
|
A21-38 nose art
|
|
|
|
A21-40
|
|
|
|
A21-40
|
|
|
|
A21-40 bomb log
|
|
|
|
|
|
A21-40
|
|
|
|
A21-43
|
|

|
|
A21-43 bomb log
|
|
|
|
A21-43
|
|
|
|
A21-43
|
|
|
|
|
|
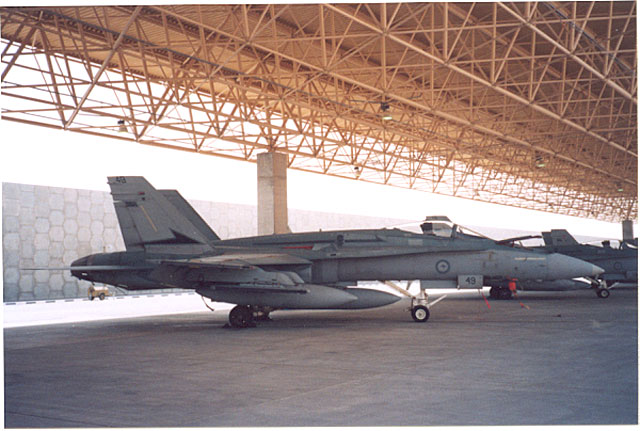
A21-49
|
|
|
|
A21-49 bomb log
|
|
|
|
A21-52
|
|

|
|
A21-52
|
|
|
|
A21-55
|
|
|
|

|
|
A21-55 nose art and bomb log
|
|
|
Further information relating to the RAAFs involvment in Operation Falconer
can be found at
http://www.defence.gov.au/opfalconer/
Text and Images Copyright © 2004 by
Ken Bowes
This Page Created on 16 April, 2004
Last updated
29 July, 2004
Back to
HyperScale Main Page |
 Home |
What's New |
Features |
Gallery |
Reviews |
Reference |
Forum |
Search
Home |
What's New |
Features |
Gallery |
Reviews |
Reference |
Forum |
Search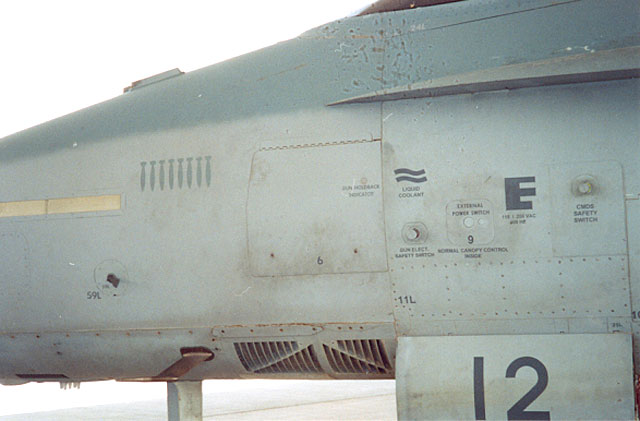


