Real metal airplanes use different
sorts of metals and different grains, which affect their
color. After applying the base coat, you can mask off
individual panels and then spray them with other shades of
Alclad II (see Figure 5). This creates a more realistic
look. You can spray individual panels with the Polished
Aluminum and other panels with the Chrome to get a
multi-hued finish. Another approach is to first spray the
aircraft gloss dark gray, mask off areas, and then spray
black. Take off the masking and apply the Alclad II base
coat—and the different undercoats create different colors.
Or use the Chrome and Polished Aluminum—and paint other
sections with Aluminum, White Aluminum, Dark Aluminum, and
Steel. Or you can mask off sections and spray with
different shades of Testor’s Metalizer.
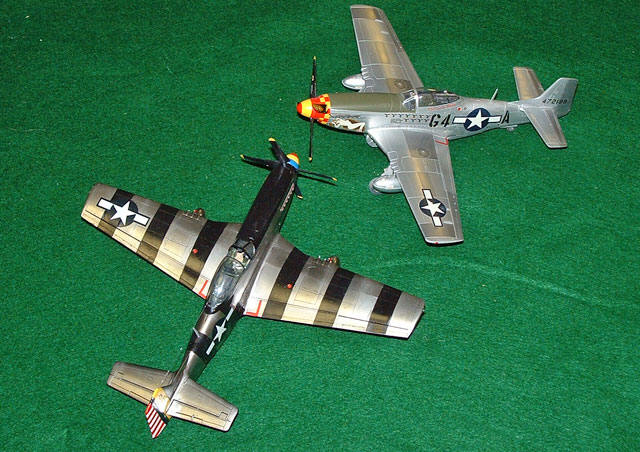
Figure
6: Alcad II is very durable. The lower P-51’s black
stripes (and all the tail markings) were masked off after
the model was first painted with Alclad II. You can’t do
this using Metalizer paints, which are not as durable. The
upper P-51 ( with the red/yellow checked nose) was painted
with Metalizer. The anti-glare panel had to be masked off
and painted, then covered with tape before applying the
Metalizer.
If your aircraft has painted areas, you
can mask these off individually and spray. Again, the
advantage of Alclad II is that it is durable enough to mask
(see Figure 6). Finally, you may find a flaw that you are
really unhappy with. You can mask this area off, resand,
and then apply a new finish. This saves you from redoing
the entire paint job.
Once done with the panels (which boils
down to modeling stamina), I apply a wash (1 part gloss
black acrylic paint, one part dishwashing liquid, and 10
parts water) to all of the panel lines and rivet holes. Let
this dry and then rub away the excess with a wet Q-tip. The
wash stays in the panel lines and accentuates them, while
the soap in the mixture allows you to rub away the dried
paint on the exterior (if the wash is too stubborn, dip the
Q-tip in 409—the Alclad II paint, unlike acrylics, is not
affected by the 409).
Then apply decals. With metal
aircraft, you can’t hide the decal film like you can with
clear coats on painted aircraft. Typically, I cut off as
much of the film as possible and just live with it where I
can’t remove it. I have seen folks apply a highly thinned
coat of gloss clear or Testor’s metalizer Sealer to the
decal film to blend it in, but I have not had good success
with this technique (since it reduces the shine of the metal
finish).
|
Advanced Alclad II Techniques |
The preceding will give you a very fine
metal finish. You can go a step further and use
post-shading techniques to make it even more realistic. On
aircraft with a painted finish, you can create a more
realistic finish by airbrushing the center of each panel
with a mix of the base color and some white (you then
overspray lightly with the base coat to blend in the area).
This creates a variability in the surface that makes the
aircraft look much more realistic. See the article by Gregg
Cooper on HyperScale.
http://www.features02.kitparade.com/gekkogc_3.htm for a
very well done overview of this technique.
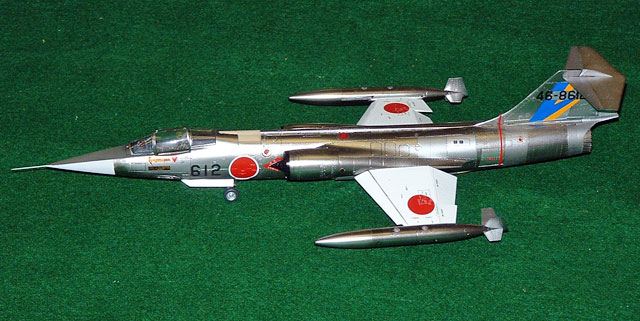
I have been experimenting quite
successfully with a variant of this technique using Alclad
II that has generated some really impressive results (see
Figure 7). I first paint the whole aircraft in Chrome
(after applying the gloss black undercoat). I then spray
the center of the panels with Aluminum (which is not
translucent and thus appears lighter in shade). After this,
I spray the whole aircraft with a light coat of Chrome. The
result is a variability in the surface color that, to my
mind, looks much more like a different toned metal surface
than any other technique available.
Figure 7: Advanced Alclad II
Technique
Another variant of this technique is to
spray the model gloss black and then airbrush the inner part
of the panels in gloss dark gray (similar to the technique
discussed in the first paragraph of this section). Let dry
overnight and spray the entire model with Chrome or Polished
Aluminum. Since the paint is translucent, the differing
undercoat colors create a variability that looks more
realistic. You can combine this technique with other colors
for accenting panels or panel lines.
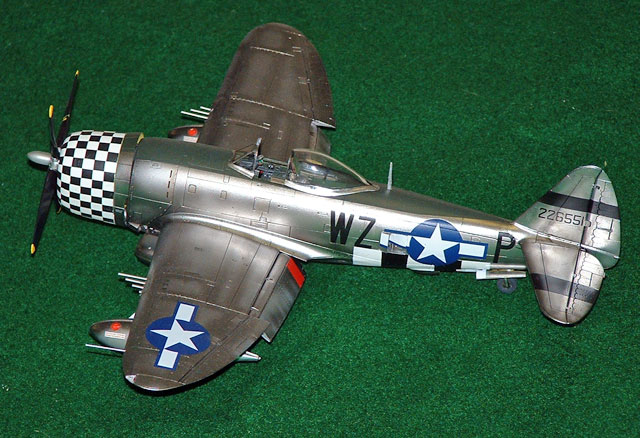
Figure 8: The author’s Tamiya
P-47 using the advanced Alclad II technique
Floquil is a highly durable paint for
model railways that provides an excellent metal finish (but
does not compare to Alclad II). Floquil has three key
colors: Old Silver, Bright Silver, and Platinum Mist. The
advantages of the paint are its extreme durability (you can
mask over it with no problem), it can be sprayed over putty
if you desire, and you can create two different shades of
metal from the same coat.
To apply Floquil, I assemble the model,
wet-sand the seams, put on a coat of primer, wet sand with
the 1800 grit, and then apply the silver coat. You can then
mask off panels and rub them with Brasso or a polishing
compound, which slightly changes the color of the panel. So
with Old Silver, Bright Silver, and Platinum Mist you can
get a total of six different shades.
Another Floquil technique is to paint
the model with Floquil, rub it out with Brasso, and then
mask off areas to spray with SNJ or metalizer. You don’t
get quite as good a surface as polished plastic, but it is
better than over a primer.
Floquil is also an excellent choice if
you are painting an aircraft that was painted silver (for
anti-corrosion purposes).
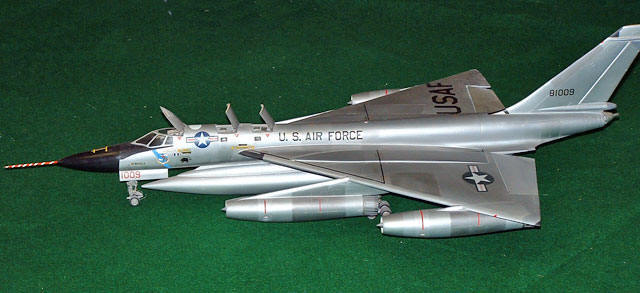
Figure
9: My Monogram B-58, which I built about 15 years ago (much
puttying!). This was done with a base coat of Floquil
Platinum Mist that was rubbed out using Brasso; the
individual panels were painted using Testor’s Metalizer
I primarily use Floquil now for metal
landing gear. After applying the paint and letting it dry,
I apply my acrylic wash and then remove the excess. The
wash accentuates the recesses and details and the paint is
durable enough to stay on as I rub off the excess wash.
SNJ used to be the hottest metalizing
product. Basically, you assemble the model as before, but
you cannot use putty—only superglue as a filler. The paint
can only be used on polished plastic—you cannot have an
undercoat to get the best effect.
The first thing to do is to prepare the
surface. You need a highly polished plastic surface for the
best effect. I recommend wet sanding seams with 400, then
600 grit. Then wet sand these areas with 1800, 2400, 4000,
6000, 8000, and finally 12000 grit from your polishing kit.
Then polish all of the plastic surfaces with Novus plastic
polishing compound (very tedious). This takes a while.
Then you need to mask off any painted
sections (like anti-glare panels), paint, wait for the paint
to dry, and then mask over these areas. You then apply the
SNJ with your airbrush, applying 4 thin coats (waiting about
10 minutes between coats). With this base coat, you can
achieve three different shades. The first comes from just
leaving the panel areas alone (masking them off with low
tack masking tape or post-its). The second shade comes from
polishing the base coat with a soft cloth. The third shade
comes from using a soft cloth to polish the base coat with
the metal powder provided by SNJ (make sure to wear a dust
mask when doing so). The latter is the shiniest, most
metal-like shade. Finally, you can then add additional
shades using Testor’s Metalizer.
The downsides of SNJ metalizer include:
the labor needed to prepare the surface, the inability to
use a primer, the need to mask off and airbrush painted
sections separately, and the low durability of the paint.
You can in theory use low-tack masking tape on SNJ, but it
pulls of the silver coat. You can mask using Post-Its (or
damp pieces of paper), but this is less satisfactory than
using modeling tape on the Alclad II. Basically, with
Alclad II you get an even shinier metal surface that is far
more durable.
 This
is the original metalizer paint that was a revolution when
it came out about 20 years ago. Basically, follow the same
procedures as SNJ metalizer to prepare the surface. After
spraying on a coat or two, let dry for 15 minutes and then
polish. Testor’s metalizer is less durable than SNJ, but
comes in a much wider array of colors, including both
buffing and non-buffing shades.
This
is the original metalizer paint that was a revolution when
it came out about 20 years ago. Basically, follow the same
procedures as SNJ metalizer to prepare the surface. After
spraying on a coat or two, let dry for 15 minutes and then
polish. Testor’s metalizer is less durable than SNJ, but
comes in a much wider array of colors, including both
buffing and non-buffing shades.
Accordingly, I use it to add additional
panel shades to aircraft sprayed with Alclad II. I use
Testor’s metalizer particularly on hot jet aircraft sections
(like the rear area of an F-100) or the afterburner cans,
where I free-hand spray brass and darker shades to simulate
heat coloring. You can mask off Testor’s metalizer using
Post-its or damp pieces of paper, but it is not very
durable.
At the HyperScale web site
http://www.kitparade.com/features00/f7ffirebomberjc_1.htm.
is an awesome example of a Metalizer
finish. The modeler recommended painting the model with
gloss enamel white, letting this dry, and then applying
metalizer. He sprayed the interior of panels a light shade
than the exterior areas—and the results are most
impressive. In addition, this modeler applied the Metalizer
Sealer after buffing out each section—this laquer-based
clear would allow you to mask over each section. I do not
use the sealer on NMF aircraft because it reduces the
shine. I do use the sealer on painted aircraft to quickly
create a gloss surface for decals, since it dries within
minutes. In fact, you can begin decaling within 30 minutes
of applying the sealer (I believe it must be a laquer-based
paint). In any case, I have not tried these techniques with
Metalizer since I’ve found the Alclad II so superior.
This offers the best potential finish,
but is very tedious to apply. I have done two 1/48th
aircraft using Baremetal Foil—you can also use kitchen foil
applied with a glue from Microscale. Basically, you apply
the foil using an artist’s stump (a pencil like tool made of
rolled paper), and then trim the excess foil from the panel
lines with an X-acto knife and remove. It takes a long
time—but looks really good when it is done. It is difficult
to apply to some curved areas (like the end of drop tanks).
I use metal foil for accents, such as
the oleo struts on landing gear—or for some metal panels
(just to add a different hue). Finally, I almost always use
Baremetal Foil to mask canopies—you apply, rub it down to
highlight the panel lines, cut away the excess, and then
spray. Pull off the Baremetal Foil to reveal the clear area
after painting. You can clean away the glue residue using
“Goo Be Gone” (available at Granddad’s or a craft store),
which does not damage the clear plastic.
I have read articles on people who
assemble models and then take them to a shop to have chrome
plating added. This would be quite costly, but create a
very realistic finish.
So there you have it—my 25 years of
experience doing metal finishes (I’ve probably done 30
metal-finish aircraft in that time, since I love the
1950s). I recommend Alclad II, which is a dream come true:
shiny metal finish, ability to use primer for surface
preparation, quick drying, and highly durable. And using
post-shading and undercoating techniques, you can make the
finish even more realistic.
However, you can use Floquil, SNJ,
Testor’s Metalizer, and metal foil on the same model to
create a varied paneled look—basically, you will find
modeler endurance is the limiting factor. With Alclad II,
an average modeler can create a metal finish quickly and
easily that in previous years was only achievable by experts
with a lot of time. With Alclad II, I’ve gotten to the
point that I now actively seek out metal aircraft models
instead of avoiding them. Indeed, I think you will find
that you can do metal aircraft in less time than painted
aircraft (since you don’t need to apply any finish coats to
the aircraft). The important thing is to give it a try.
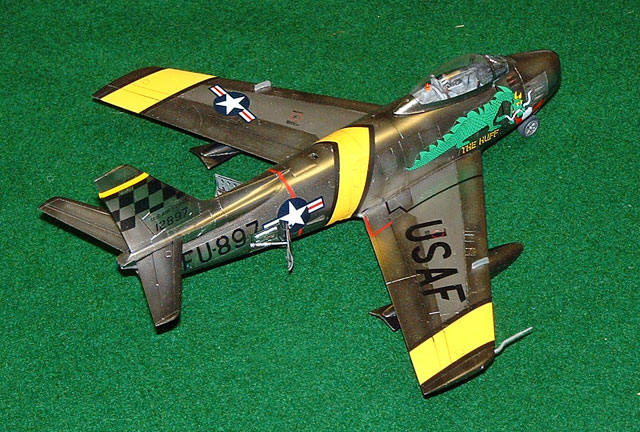
Figure 10: My Hasegawa F-86
done in Alclad II. The various panels were post-shaded
using Aluminum; the center panel on the wing was painted
with Dark Aluminum. The recognition stripes were then
masked off and painted (first Floquil Engine Black, which
was masked off so that I could apply the Tamiya Flat
Yellow). This shows you how durable the Alclad II is. I
then applied the acrylic wash to bring out the panel lines
(I used a pencil for the panel lines on the painted areas.
Decals are an old set from Microscale (but have been
recently put out by Meteor). I did not apply any sealer
coat.
 Home |
What's New |
Features |
Gallery |
Reviews |
Reference |
Forum |
Search
Home |
What's New |
Features |
Gallery |
Reviews |
Reference |
Forum |
Search