|
Masking Canopies Using Bare Metal
Foil
by Dave
Sherrill

HyperScale is proudly supported by Squadron
Masking canopies would not be at the top of most modelers “fun
to do” list. What I want to demonstrate in this article is that masking canopies
does not have to be a laborious or dreaded phase of model building. By using
Bare-Metal Foil (BMF) you can actually mask and paint most canopies with very
good results in a short amount of time. For demonstration purposes I’m using the
“greenhouse” canopy from Hasegawa’s excellent 1/48 C6N1 Saiun kit. Because of
its size, it fills the camera frame and would most likely be regarded as a
drudgery to mask. There are 20 separate frames just on the canopy piece;
however, it took me under an hour to apply the foil, burnish, cut, remove the
excess foil, and prepare it to paint.
The first step to a successful masking project using BMF is to dip your canopy
in that miracle modeling elixir known as Johnson’s Future, or Kleer. Dipping in
Future has several essential benefits. Your paint will adhere better, clarity
will improve, and the amount of residue that BMF is notorious for leaving behind
will be minimal.
I start the dipping process by holding the canopy at the tip of one end with a
pair of self-locking tweezers. Next, I dip the canopy in a small narrow jar
filled with Future and hold it under for a few seconds. I then lift it out and
tap some of the excess off on the edge of the jar. Using a soft #4 artist’s
brush, I brush or wick away any excess Future that has settled to the edges and
corners of the canopy. This is a very important step in the process. If left to
dry, excess pooling of Future can cover the contours or recessed lines of the
framing and you will not be able to burnish the details needed to guide your
cuts. I allow the canopy to dry overnight in an empty Altoids tin with some
holes drilled in the sides. If you feel you need to redo your dipping effort, a
short soak in some household ammonia followed by a wash in warm soapy water and
wiped dry with a soft cotton cloth should have you ready for another try. Here’s
a photo of the canopy with a coat of Future applied. I dropped my first attempt
on the floor and had to start over.
So now your canopy is Future’d and you’re ready to start
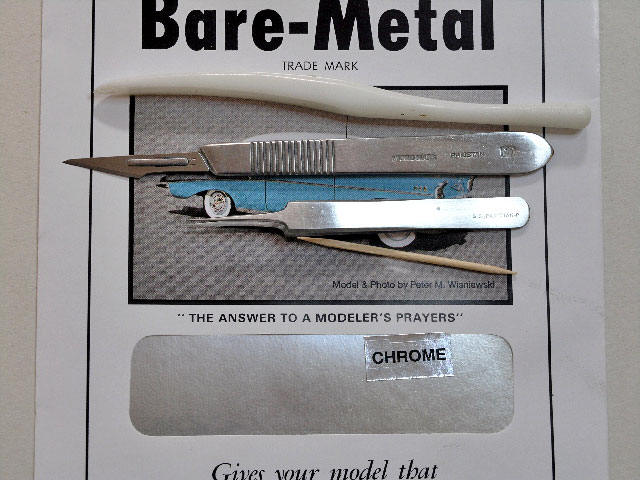
masking. There are several different types of BMF such as Black Chrome, Ultra
Brite Chrome, Matte Aluminum, etc. But the only one to use in my opinion is
simple Chrome. I’ve tried some of the others and they just don’t seem thin
enough; even cutting them with a new scalpel blade often caused jagged tears.
They also left a lot of residue.
I photographed some of what I consider to be highly essential tools for masking
with BMF: a burnishing tool, a #11 scalpel, a pair of needle-nose tweezers, and
a sharp pointed toothpick.
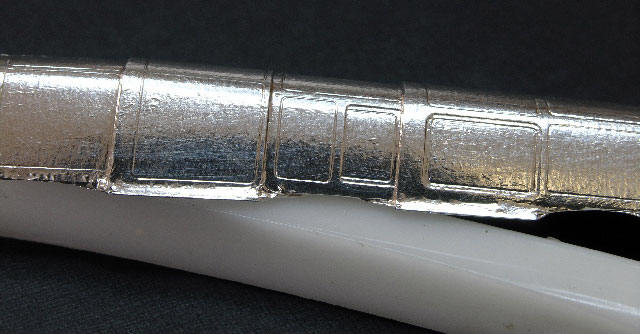
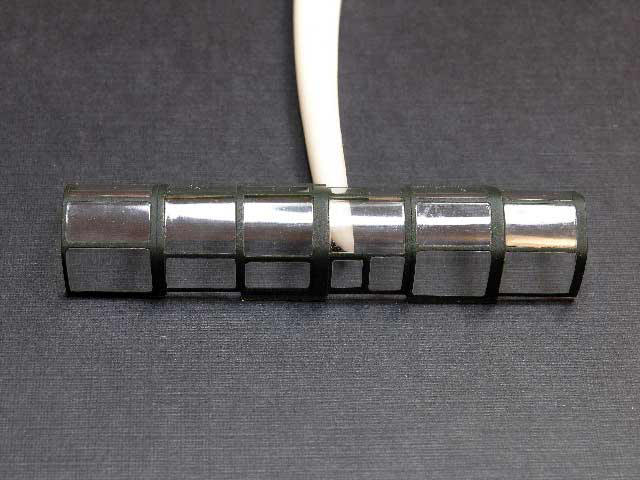
Start the masking by cutting a section of BMF that covers the
canopy. Depending on the shape of the canopy you might be able to cover it all
with just one piece. With bubble tops and windscreens it usually requires more
than one piece for a smooth surface. A little wrinkling is inevitable, but you
don’t want big ridges. In this instance I was able to get by with one piece, and
I did an initial burnishing with my fingers and burnishing tool. To really bring
out all the detail, I ran the toothpick into all of the corners, edges, and
crevices. I’ve found that Hasegawa canopies have recessed lines to simulate the
framing, and Tamiya canopies have raised edges. Both work well as guides for
cutting the BMF.
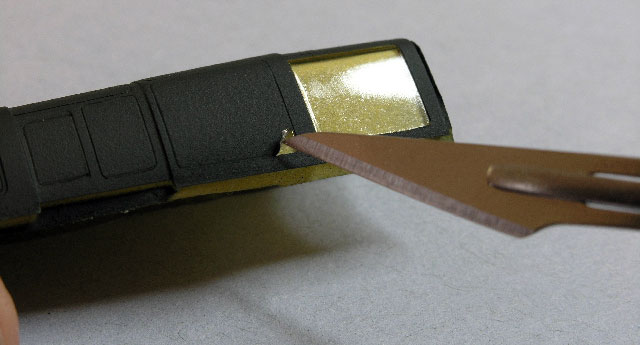
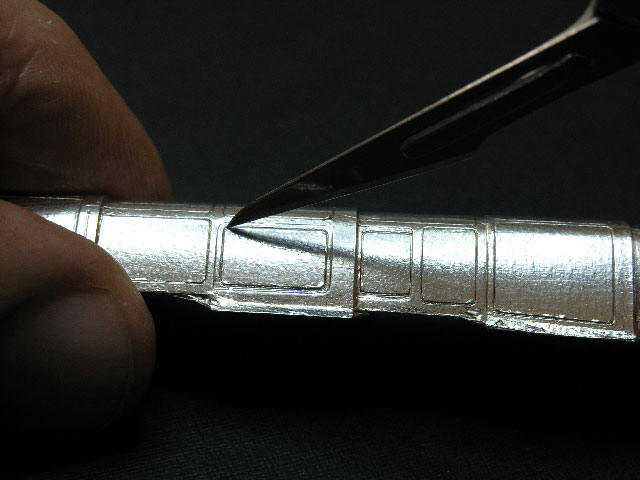
Once all the detail has been thoroughly burnished and you can
see all the framing, it’s time to start cutting. I like to use a #11 scalpel
blade, but a #11 X-acto will work as well. You’ll want to use only light
pressure to cut around the frames. When cutting raised framing, you’ll want to
apply slight pressure not only downward but towards the framing as well. It
doesn’t take much pressure to cut through the BMF. I wear close-up reading
glasses under good lighting for this part of the process. I’ve masked a lot of
canopies but have never made any serious slips and ruined a canopy. I think the
key to this is being methodical and using only light pressure on the blade. With
its recessed frame lines the Hasegawa canopy was very easy and simple to cut.
The blade stayed right in the groove. The rounded corners of the framing were a
bit tricky, but I found that placing the blade on its tip and going slowly to be
the best method for this kind of cut.
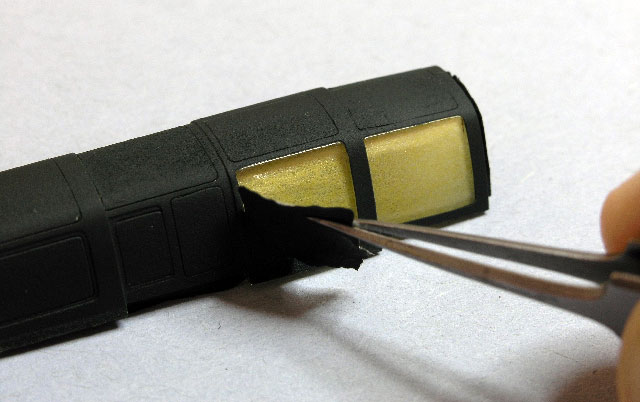
If you’ve cut all the edges of the framework it will be easy to
lift off the excess.
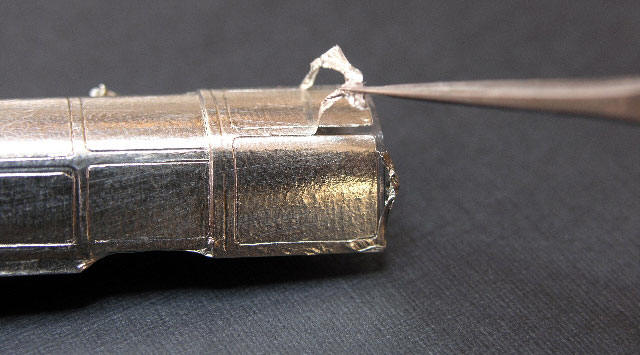
If you make a slight error, re-masking and re-cutting with a
small patch of BMF is easy to do. Once the entire framework is exposed and
you’re satisfied with your work you should gently wash the canopy in some warm
soapy water and dry with a soft cloth to get rid of any skin oil that might have
been left by all the handling. If you’re going to paint your canopy in place,
now’s the time to glue it on the model.
I generally use Tamiya acrylics for model painting, and in this case I used
their Japanese Navy cockpit color (XF-71) as the first coat. That way, when I
finish painting, the interior of the canopy has the lighter cockpit color
showing. When that coat was dry, I airbrushed a coat of Tamiya’s Japanese Navy
Green (XF-11). After that was dry I applied a thorough coat of Testor’s Dullcote.
I like to paint my models and canopies whether separate or attached at the same
time, and with all the same clear coats. That way my canopy framing and fuselage
match in color tonality.
If there’s a fun part to all of this, it might be at the stage of the process
where the masking is removed. This is where my scalpel and needle-nose tweezers
really come into play. No matter how many days I’ve left the masking on (and I
know some of you out there reading this might not believe me), I’m generally
able to pull off the masks in one piece. Carefully use the tip of the scalpel to
lift an edge of the mask. Once you have a small flap lifted, use the tweezers to
gently pull off the rest of the mask.
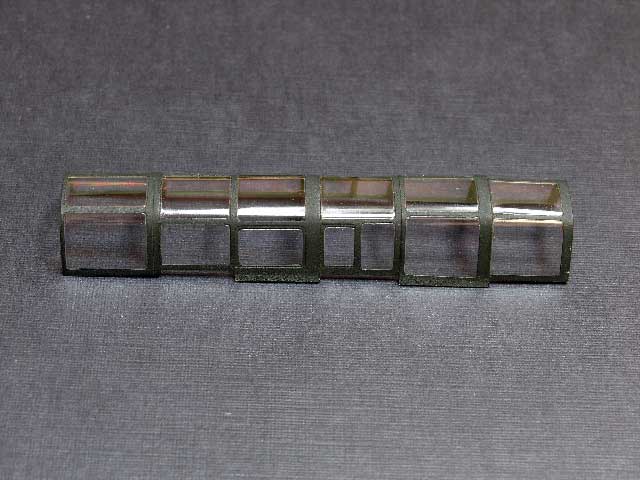
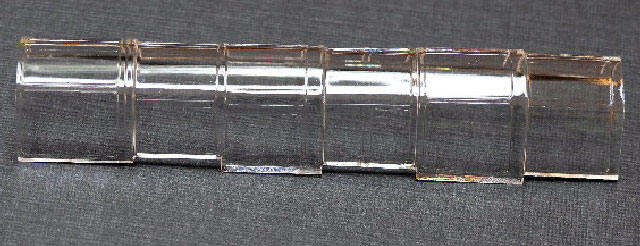
Click the thumbnails below to view
larger images:
Using this method, I have not yet marred the surface of any
canopy. It’s just a matter of using light pressure and taking your time. I can’t
stress enough the importance of using needle-nose tweezers in this process.
There’s no other substitute for grasping the little flaps or small slivers of
BMF. To avoid the paint chipping that sometimes occurs when removing the masks,
you might want to consider running your blade around the framing one more time
before lifting the mask. I didn’t in this case, and I only had one small chip
that was easy to touch up. I placed a small piece of BMF over the chip,
burnished, made a cut along the frame and gave it some paint on a fine-tipped
brush. I’ve had very few problems with chipping if I make sure to dip with
Future and to not pull the masking back over an edge. Always pull the masking
away from or along the frame edge.
The final step is to clean any residue from the BMF that’s left on the
previously masked surfaces. For this I used a Q-tip bud lightly dampened with
WD-40. The WD-40 cleans the residue very quickly. Lastly, I gave the canopy a
wiping with a soft cotton cloth to remove the WD-40 and polish the surface.
Personally, as long as I cover my painted canopy with a clear coat of Dullcote I
have not experienced any paint removal, discoloration, or marring using WD-40.
To judge the safety of using WD-40 on painted surfaces I tested WD-40 on
unprotected Tamiya acrylic and Testors enamel painted on some scrap plastic.
After some hard rubbing I got a very faint color removal of the acrylic paint. A
light rubbing however, was all it took for a complete removal of the enamel. A
citrus solvent product called Goo Gone can also be used to remove residue. I
tested Goo Gone on the same unprotected painted surfaces and got the same
results. Both Goo Gone and WD-40 dissolved the unprotected enamel paint. They do
not however; seem to have any adverse effect on clear acrylic or clear lacquered
surfaces.
Above is a photo of the final result. Whatever jaggedness you might see on the
edges has more to do with the lighting and pixel count than how it actually
appears.
In conclusion, this is a process that has worked for me.
Everything I’ve written is based on my experience. Your results may differ. If
you’re interested in improving your masking results I encourage you to give this
technique a try. The best way to begin is to test it out entirely on a spare
canopy before you actually try it on your latest project. BMF, I should add, is
also excellent for masking wheels. If you have any questions or want to
correspond about this article you can reach me at
davesher49@comcast.net
Text & Images Copyright © 2005 by
Dave Sherrill
Page Created 20 September, 2005
Last Updated
19 September, 2005
Back to Reference Library
|
 Home |
What's New |
Features |
Gallery |
Reviews |
Reference |
Forum |
Search
Home |
What's New |
Features |
Gallery |
Reviews |
Reference |
Forum |
Search