|
Plastic Surgery for Hasegawa's
New 1/32 Scale Messerschmitt Bf 109K-4
Correcting the K-4 Belly
by Vincent Kermorgant

HyperScale is proudly supported by Squadron
The Me 109K-4 belly differed from the previous G versions in two areas.
First, because it used the MK108 as standard central weapon which meant
that there was no need to keep the spent ammo belly bin that existed on
the earlier versions.
Secondly, because it was powered by the Daimler Benz DB605D which had a
different supercharger from the earlier DB605A and DB605AS.
Since there was no more spent canon ammo bin in the belly area, the vents
were deleted and an offset ejection chute added.
Then, the DB605D required the rerouting of the oil breather line exits
and the addition of a vent beneath the compressor for the overpressure
valve.
Let's now look in detail what we must do on the kit to represent these
modifications :

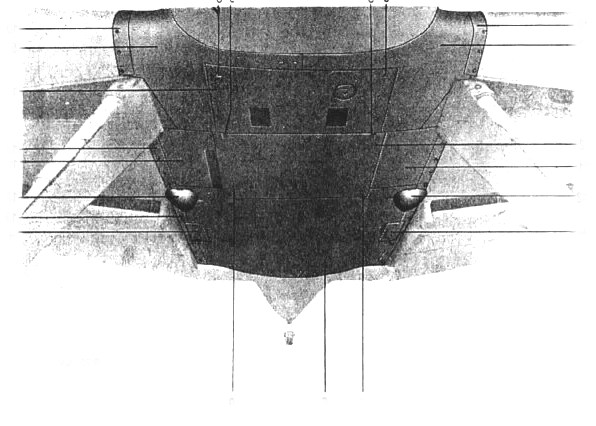
This picture shows what the belly look like once you have done what is
indicated by the Hasagawa instructions. You have cut ou the MK108 ejection
slot and filled in the vents. I have used Cyano glue to fill the vents.
Make sure that you fill ONLY the vents and none of the other details (fuel
line, compressed air connection, drop cable) as they were on the real K-4
as well
Also on that first picture I have cut out the MG131 ejection slots as it
looks better that way, but the choice is up to you. The original belly
includes the 2 oil breather outlets (marked "1" on the photo). These are
correct for the planes with a DB605A or AS engine only so sand them off.
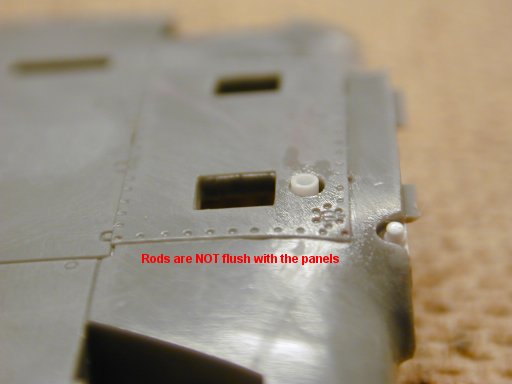
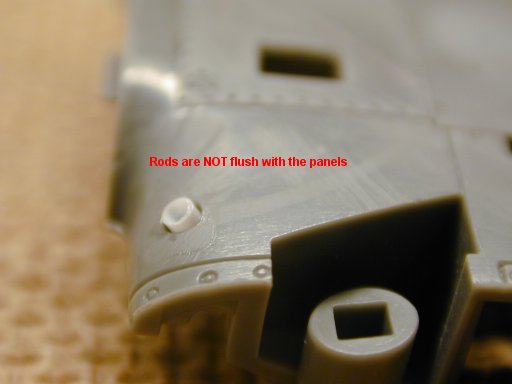
Next, drill 2 1.5mm holes as pictured below. Blank them from inside the
belly and add a 1.3mm tube as pictured inside them. Notice that they are
not flush with the belly. These are the DB605D oil breather outlets
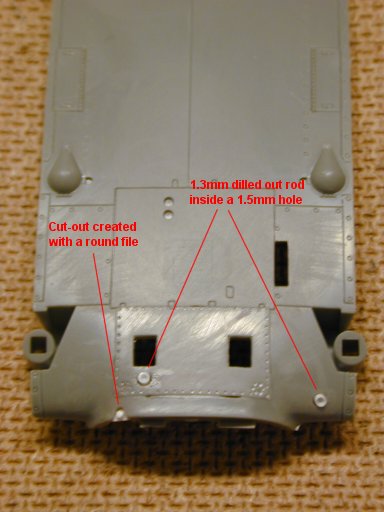
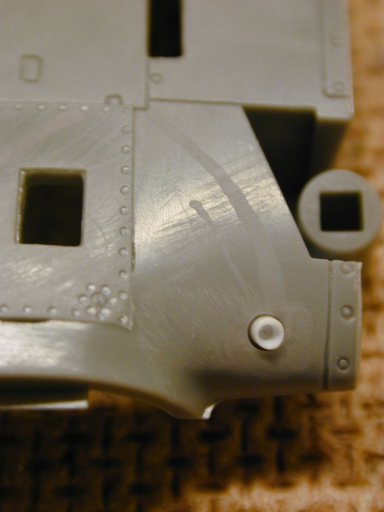
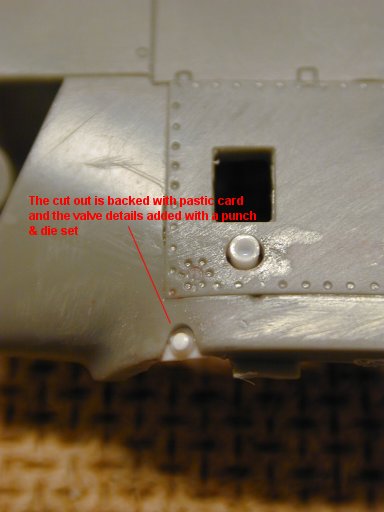
Then you need to create the overpressure valve port by using a round
file. See the picture above for location and the picture below for
detailing. Basically, all you need is to blank the port from inside and
add 2 discs to simulate the valve itself.
The few next pictures should help you cutting the 1.3mm tube to the
right length.
Click the thumbnails below
to view larger images:
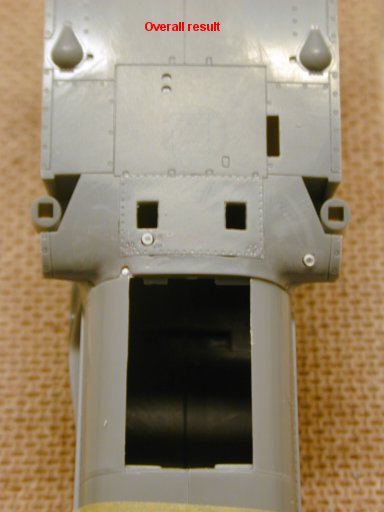
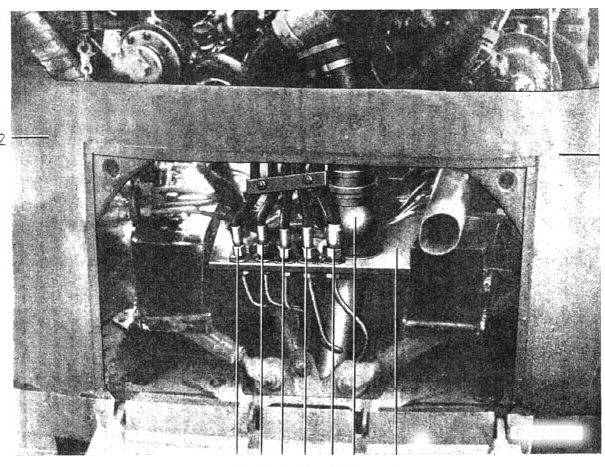
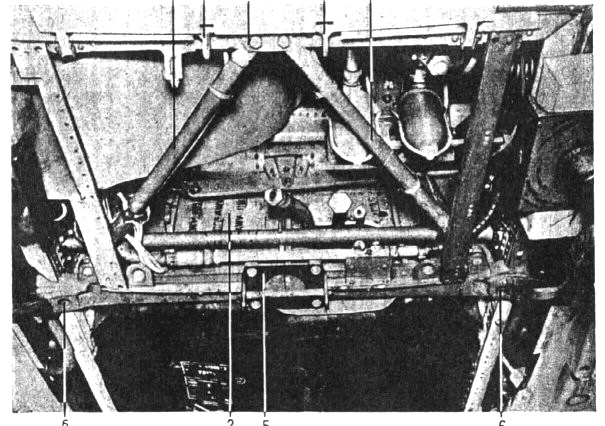
Then to conclude, here's a misleading picture :
This picture comes from the original K-4 manuals but unfortunately
shows a prototype of what should have been the K-1 or the K-2 with a
DB605A engine (it is in fact the same plane that appears in the first Japo
book). This does not represent a production K-4.
The 2 next pictures show a production K-4. Even if the panels are off, you
notice the breather outlet and the position of the MK108 slot...
Finally, if you wish to represent a G10, you need to make the same
modifications except :
I hope this was useful!
|
 Home |
What's New |
Features |
Gallery |
Reviews |
Reference |
Forum |
Search
Home |
What's New |
Features |
Gallery |
Reviews |
Reference |
Forum |
Search