|
How to drop the
F-16’s
Flaperons
by Ryan Fernandez

HyperScale is proudly supported by Squadron
I recently read a fellow HyperScaler’s comment about all the awesome
photos of built and almost completed models being posted on Plastic
Pix but one comment he said really stood out for me. The modeler had
requested other modelers out in cyberspace to write up some how-to
techniques to help the beginners out. Well, I welcomed the request
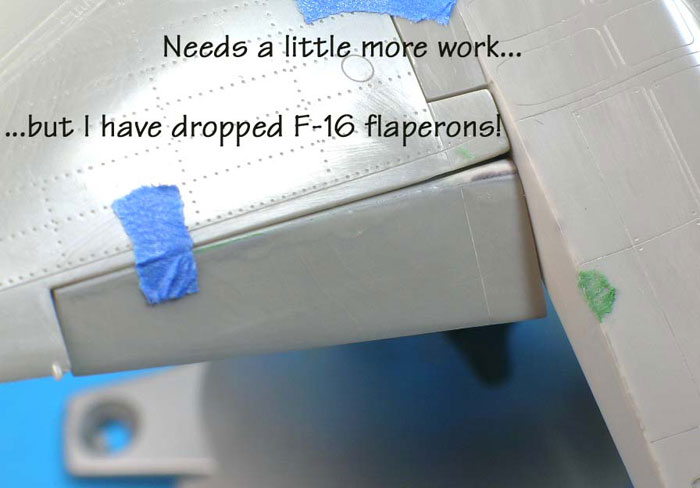
and decided to do one: How about dropping the flaperons (combination
of aileron and flaps) on the F-16 Fighting Falcon! In my how-to
article, I am using a 1/48 Hasegawa F-16 kit and showing you how to
do this simple modification to add some extra realism to your kit!
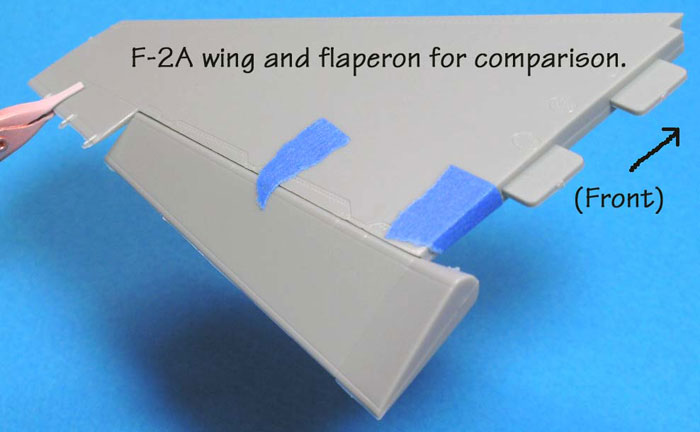
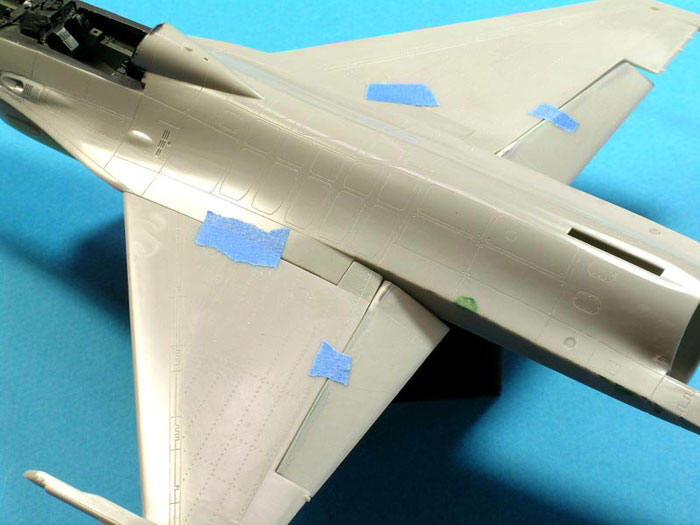
Before I begin I want to note that in addition to the 1/48 Hasegawa
F-16 wing parts used in my article, I will be using wing parts from
another Hasegawa kit of a Japanese F-16 derivative, the Mitsubishi
F-2A. I used the wing parts of this kit as a comparison with my
dropped F-16 flaperons because the area of concern is so similar
between the two kits (albeit different wing and flaperon sizes) and
it helps to show the reader what result I am eventually trying to
get to! In other words, the Mitsubishi F-2 kit already has dropped
flaperons (as well as dropped leading edge slats) and I’m just
trying to copy “the look” by using the F-16 kit. Got it? So here
goes…
Materials needed:
1. sharp, new X-Acto No.11 blade
2. round needle file
3. Evergreen half-round plastic rod or equivalent
4. contour putty (Testor’s plastic putty or Squadron putty or
equivalent)
5. plastic cement
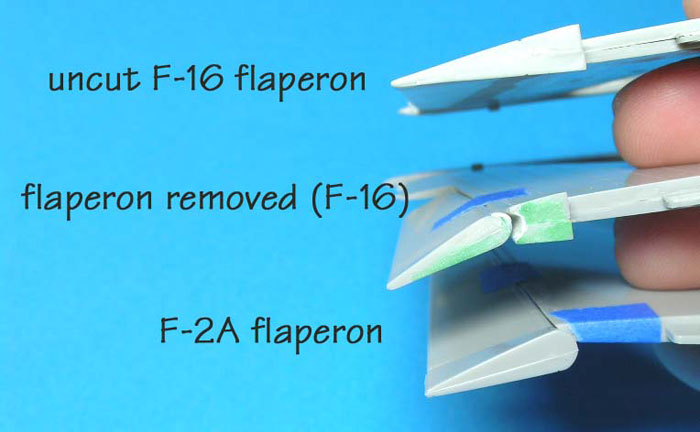
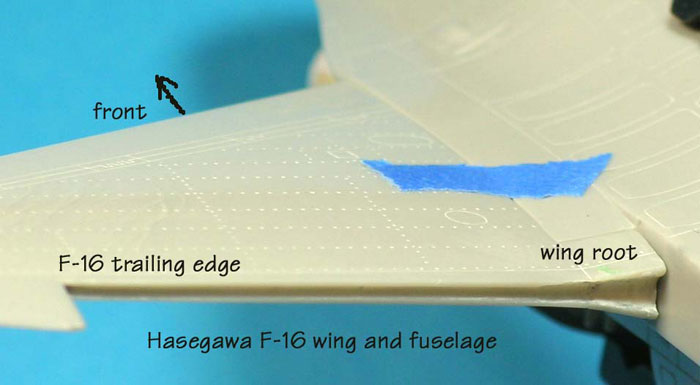
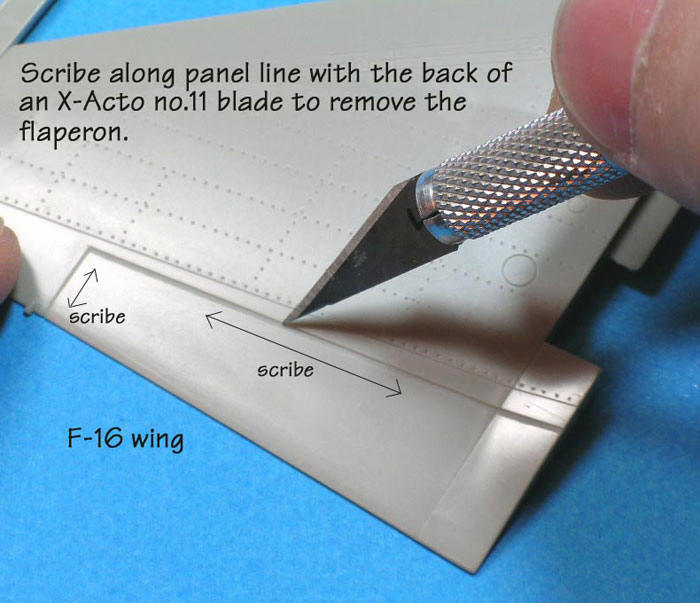
Step 1 Removing the Flaps:
To drop the flaperons (I will now refer to these parts here as
“flaps” from now on so as to avoid more typing!) on the F-16, you
will first need to cut out the parts from the main wing. Do this by
scribing along the flap’s “panel line” with the back of a sharp, new
Number 11 X-Acto blade (see fig.2). Work slowly and carefully to
avoid damaging the surrounding area of the flaps. Once you’ve
removed the flap continue to the next step.

Step 2:
This part involves cleaning up and reshaping the
flap(s) you just cut off (You did remove both? No? What? Go repeat
Step 1 and cut out the other flap!). Okay class, keep up the pace
and pay attention! That means you Craig in Daytona and Wookie in the
back row! Where were we? Oh yeah…Step 2. Clean up the forward end
(the leading edge) of the flap you just cut off by sanding a little
of it flat. I use sandpaper (600 grit) placed on a flat surface
(rough side up Craig!) to accomplish this.
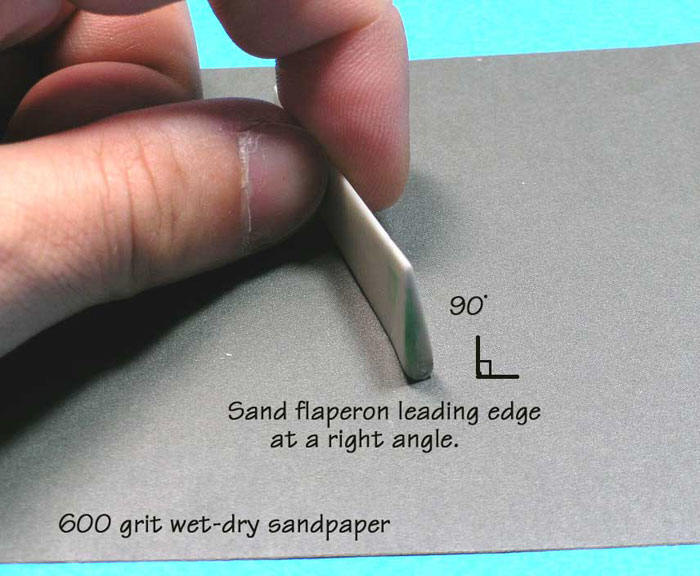
Why? Because it helps when you go to the next step!
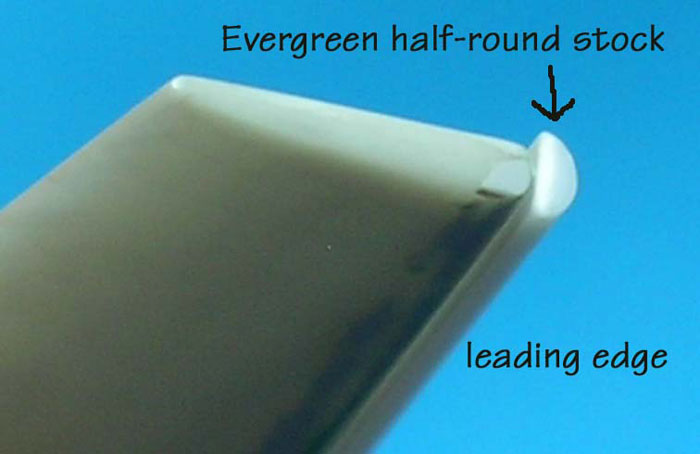
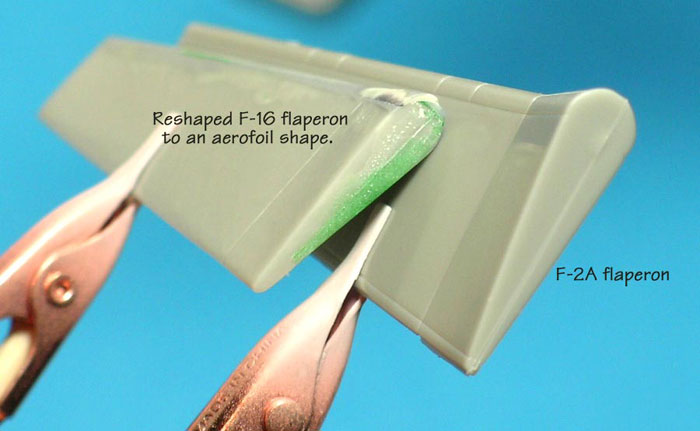
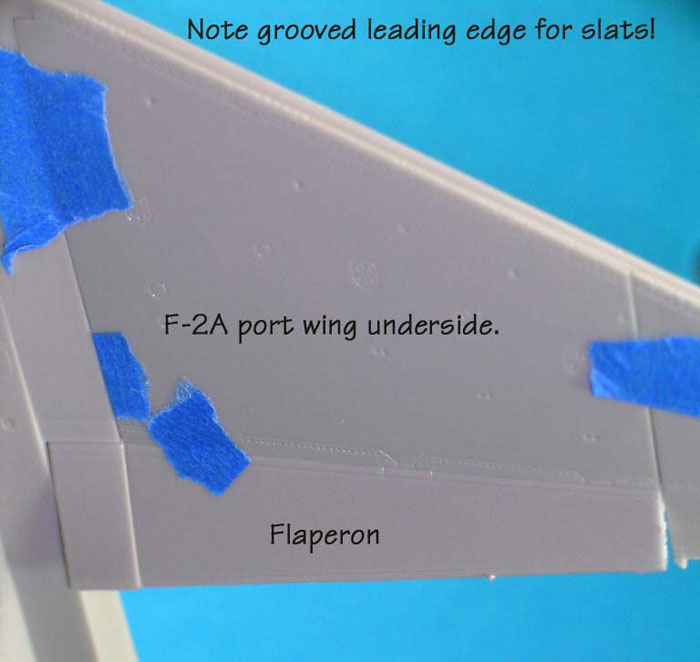
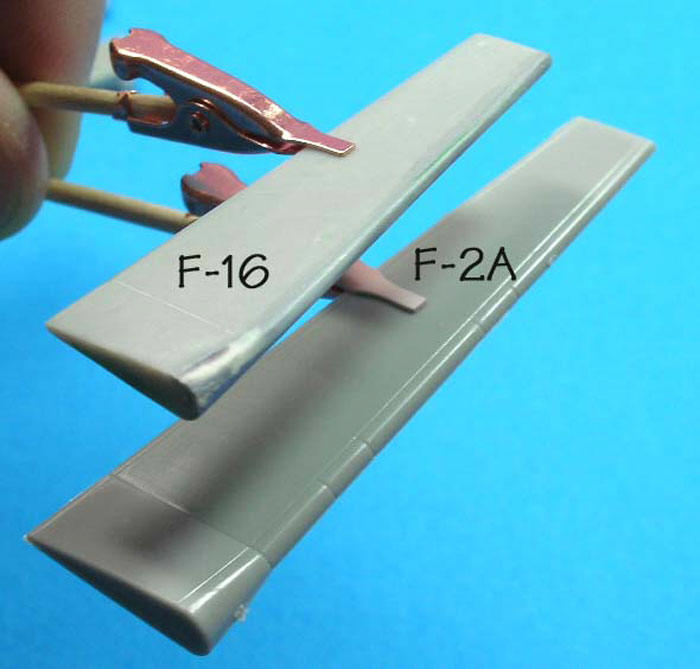
Step 3: Reshaping the flap to an aerofoil:
Next, you will need to reshape the leading edge of
the flap into an aerofoil. As molded on the Hasegawa F-16 kit, the
flaps you removed are not in the shape of an aerofoil and are a bit
short in chord. The flap needs to look like the Mitsubishi F-2A flap
(See figures 5 to 9 below and compare.) Note that the F-2A has a
bigger wing and hence a bigger flap so don’t think that the F-16
part is too small. I’m just using the F-2A parts as reference. To
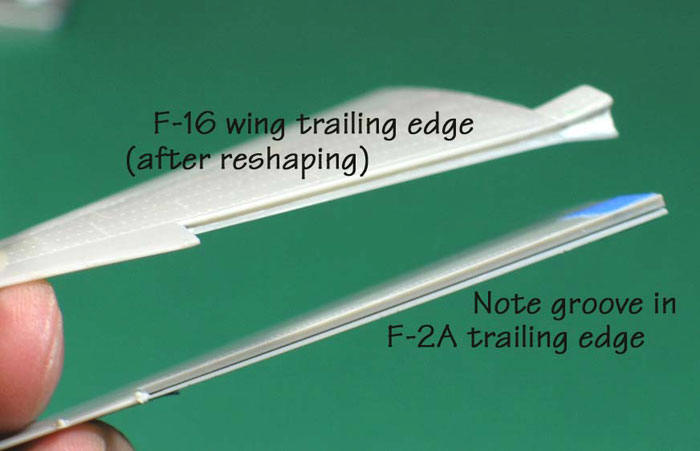
get the F-16 flap’s leading edge to look like the F-2A flap’s
leading edge, you will need to glue a piece of half-round plastic
stock (available from Evergreen Scale Models, Inc.) cut to size to
match the length of the F-16 flap leading edge. Now here’s the
tricky part! Adding the half-round plastic doesn’t instantly make
the flap into an aerofoil shape. It will need some help with your
favorite contour putty (I use Testor’s plastic putty and Squadron
Green Putty) and some more sanding! Once you’ve got an aerofoil
shape, you can move on to the next step!
Click the thumbnails
below to view larger images:
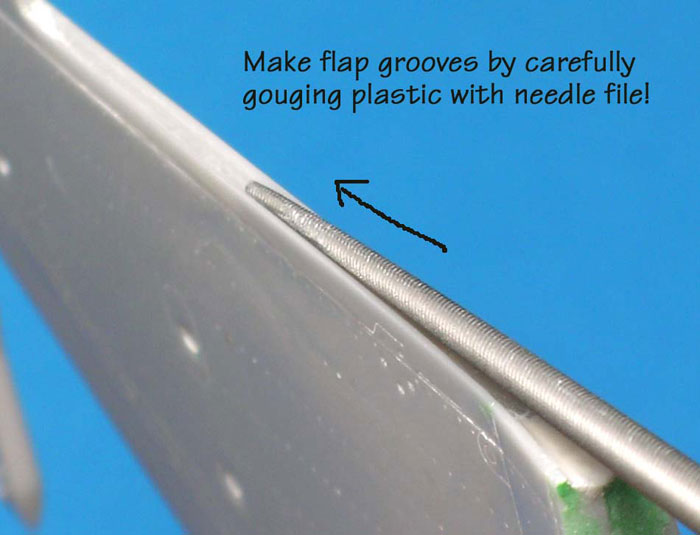
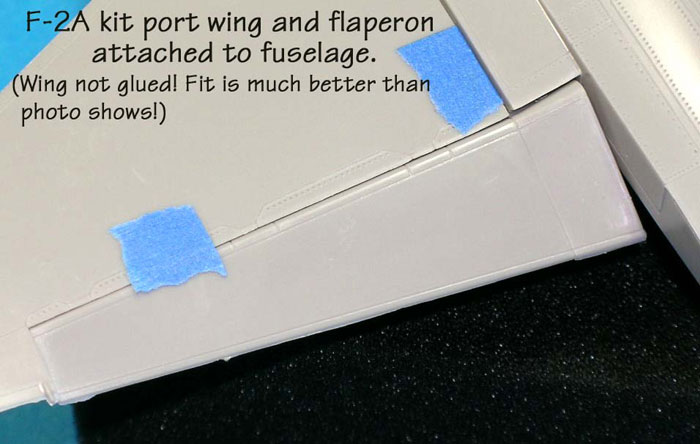
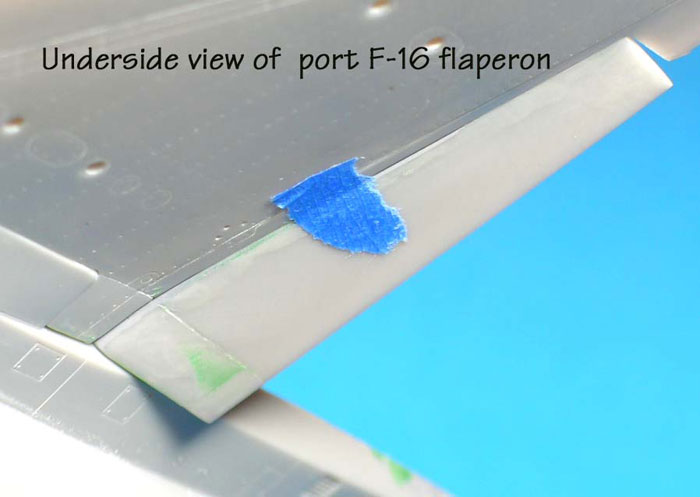
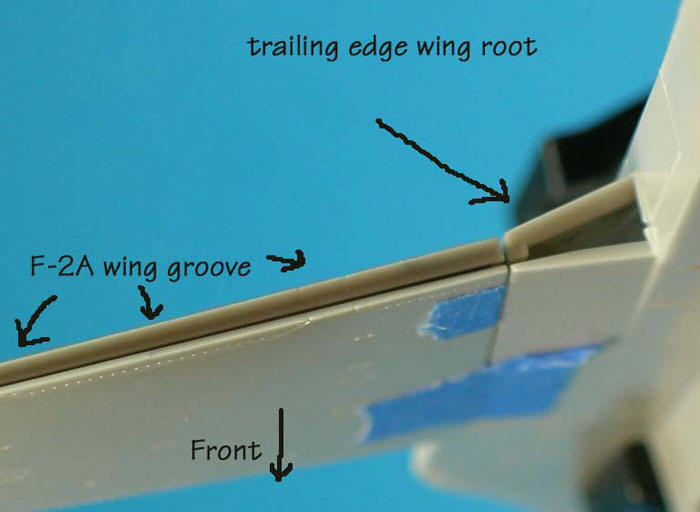
Step 4: Main wing flap well:
In this final step, you will notice that the F-2A
wing’s trailing edge has a rounded groove (trough) that exactly fits
its flap’s leading edge. On the F-16 kit wing, once you’ve removed
the flap, all you’ve got is hopefully a flat sided area that needs
some re-shaping. You were careful removing the flaps in step 1
right? To make a similar groove in the F-16’s trailing edge I used a
rounded needle file and slowly gouged the plastic until I got it in
the shape of the F-2A’s flap groove. Once you’ve reshaped the F-16’s
wing grooves to match the F-2A’s in the photo, check the fit of the
F-16 flaps to the main wings to insure a close fit. If not, more
reshaping of either the flaps or wing grooves with putty or the
needle file is required. Once you’re satisfied, you now have dropped
flaps! (Check your references to see how much to drop the flaps.)
Click the thumbnails
below to view larger images:
References
Model,
Images and Article Copyright © 2006 by
Ryan Fernandez
Page Created 05 January, 2006
Last updated
04 January 2006
Back to HyperScale Main
Page
Back to Features
Page
|  Home |
What's New |
Features |
Gallery |
Reviews |
Reference |
Forum |
Search
Home |
What's New |
Features |
Gallery |
Reviews |
Reference |
Forum |
Search