|
Building Dioramas
Part Three: Shelter Box
By Helmut Latoschinski
My third diorama article suggests a different background for
photographing or displaying your models.
This complex project was inspired after flipping through books with
original wartime pictures. You will find many such pictures in the
Squadron "In Action" series or comparable references. The major
inspiration was Axel Urbanke's "Green Hearts" book. It contains some pics
about a scene very near to the photo above: A wooden revetment made of
trunks with camouflage nets and some large farm buildings in the
background located at Hesepe (near Osnabrück) in the north-west of
Germany.
The challenge was how to depict the camouflage nets and if it was
possible to achieve a "natural" look. The result looks good to my eye, but
it's up to you to judge.
This diorama is not for novices. You will need a lot of time and
patience, and you will have to use your experience as a modeller.
The key to a realistic result is always to study lots of original pics,
and take time to consider how to approach the work.
One question may be: "What scale"? A shelter box for single-engined
fighters can be much smaller than one for twin-engined aircraft. If you
depict a temporary used airfield, a little mound of earth may be enough.
Durable works will be made with wooden planks or other more permanent
material.
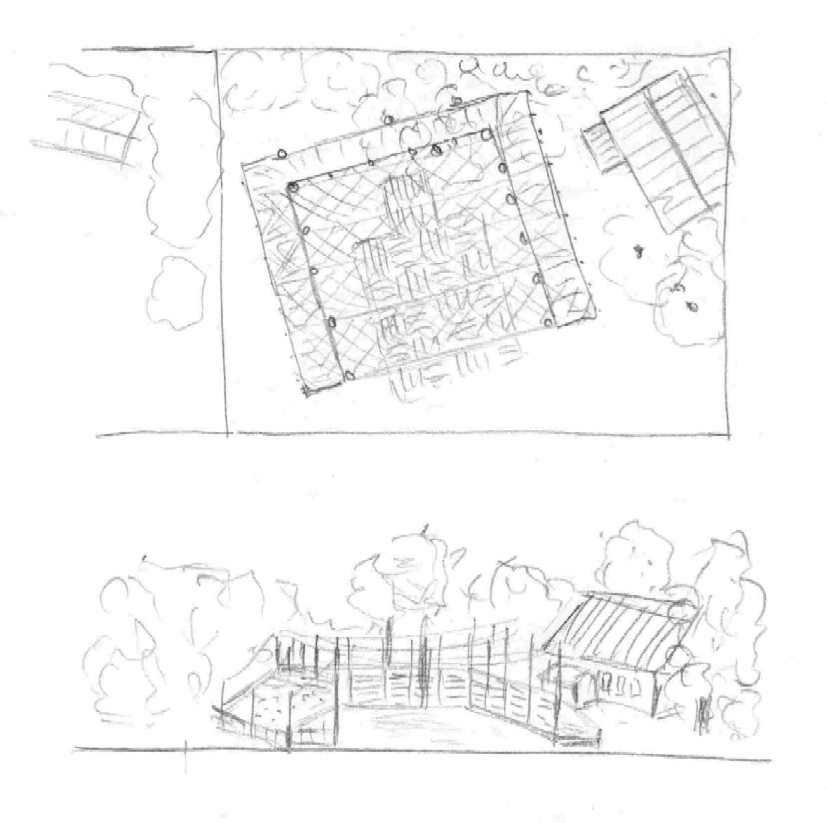
If you have made the basic decisions, a little sketch will be helpful.
To avoid problems during work, some "test scenery" is a good idea. I did
both as follows:
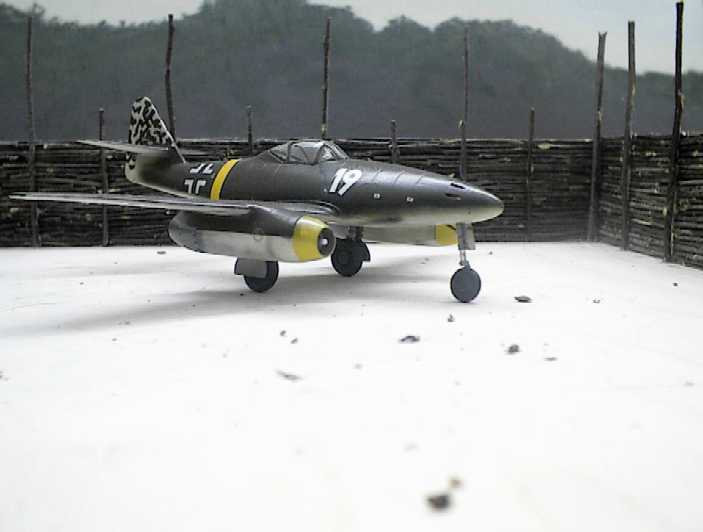
The concept was to make an addition to the existing airfield diorama
(See
Part One of this series). To depict larger twin-engined
a/c, I tested the scene with a Ju88-class model.
As always, I tried a design that does not follow the border lines of
the base. I decided to use an angled position of the box, although it
doesn't leave much space to the leading edge of the base. Although this
may limit the photographic angles for the scent, most shots will be
"frontal" into the box or in angled positions anyway. Nevertheless, I HAD
to try it.
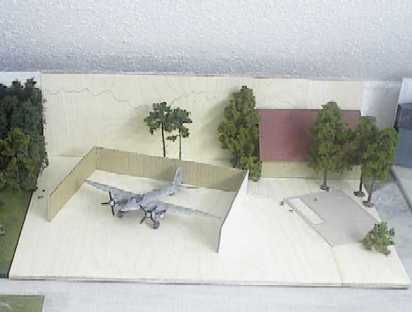
During the test I found out that my base plate (45x55 cm) was too small
to depict the buildings on the right of the shelter box. I had bought base
material for two projects so I could offer up 45x12 cm from the second one
and extended this base plate to 45x67 cm.
Building
the Inner Blast Pen Walls
Besides the camouflage nets this work was the most challenging part. My
first idea was to do it with wooden matches. But to do the inside and
outside in this style seems to be boring to me. It had to be the
trunk-type!
So what to do? Toothpicks wouldn't work - not very "real" looking. The
solution came at the local shop for farm equipment: I saw a broom of birch
branches - a traditional tool. The fine branches (down to 1 - 1,5 mm
diameter) were ideal for this work.
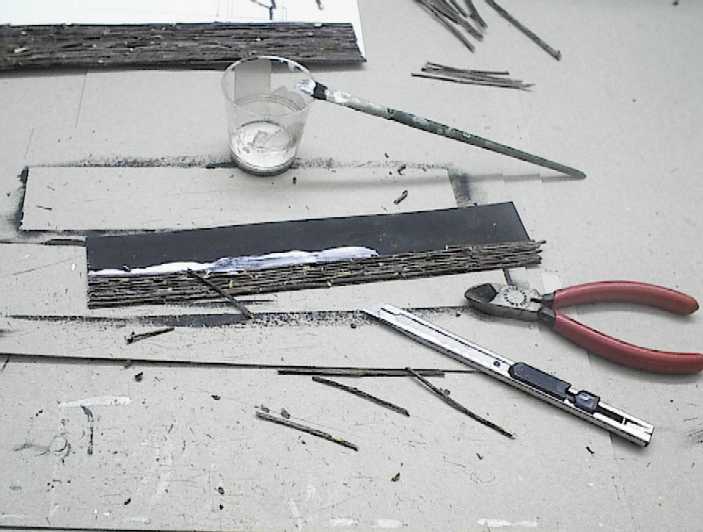
But what a lot of work - it took HOURS to glue these small branches to
the black painted card-board with white-glue.
The thin elements were hot glued on thick cardboard, which was also hot
glued to the base plate.
The above test photograph also shows the prepared background: The
plywood was painted light blue and black first. The upper edge of the
black area was altered with dark green shades of artist pastels. The sky
was also finished with my Rembrandt pastels (Netherlands).
Outer
Walls of the Blast Pen
This next step was not as complex as the inner part. A small barrier
was to depict with wood planks to hold back the outer earth cover of the
box.
This was done with sawmill equipment from Faller (Model Railroad).
The angled wall was done with thin card-board, applied with hot glue
again.
Then it was time again for some boring work: Several hundred match
sticks were to be glued into the center of the box.
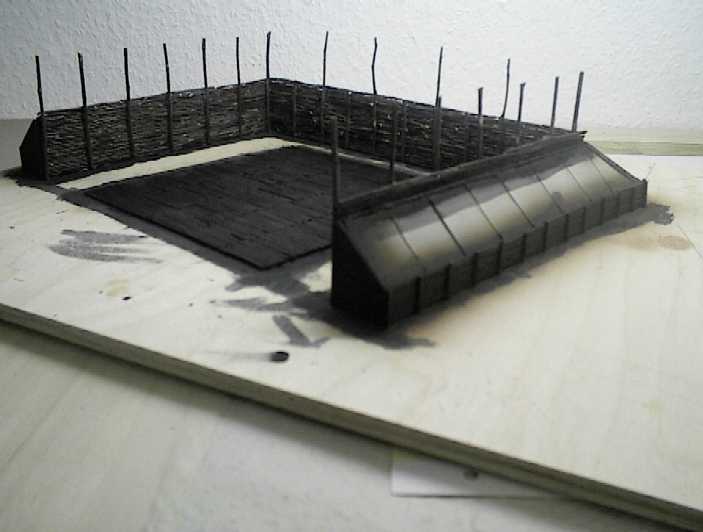
You can see the results (above) sprayed in dark brown, but not yet
weathered.
Buildings,
Putty Works & Vegetation
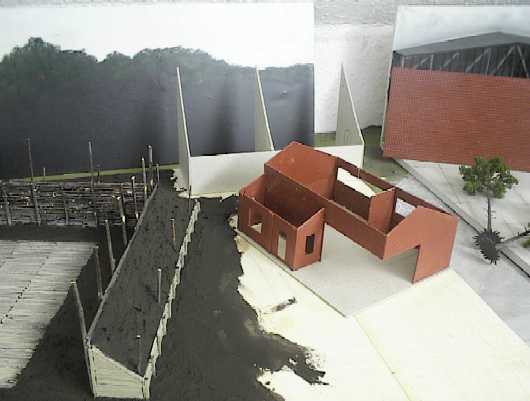 Although
not described in detail, there was a lot of work to do to modify a
"Coal Store" kit from Vollmer Railway to the desired result. The large
farm shed was built using thick cardboard for the basic structure,
covered with Vollmer brick and roof plates. You can see some of these
elements half finished on the following pictures. Although
not described in detail, there was a lot of work to do to modify a
"Coal Store" kit from Vollmer Railway to the desired result. The large
farm shed was built using thick cardboard for the basic structure,
covered with Vollmer brick and roof plates. You can see some of these
elements half finished on the following pictures.
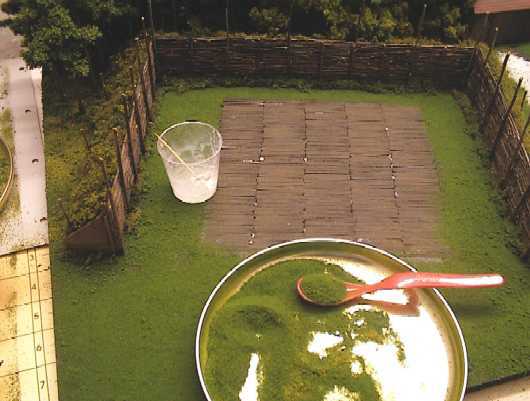
The next step was to do the putty work for the ground. I prefer my
mixture described in part one of this series of articles: Cellulose
powder, white glue and solid colour paste.
The picture (right) shows the buildings in a raw stage |
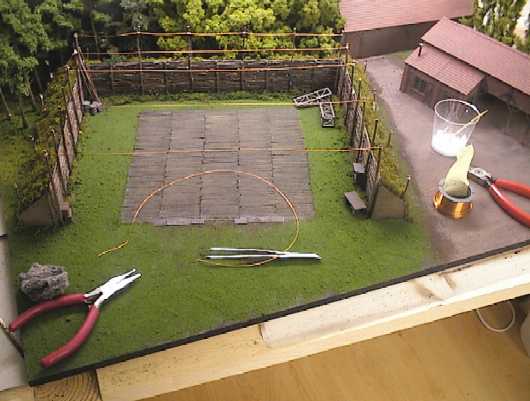
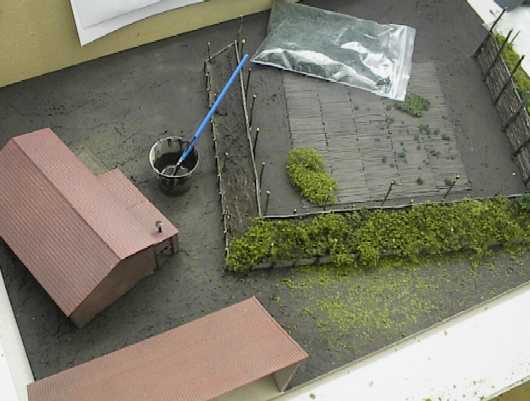 To
apply vegetation (mostly Heki or Woodland Model Railroad stuff) I used
white glue mixed with dark brown colour. To
apply vegetation (mostly Heki or Woodland Model Railroad stuff) I used
white glue mixed with dark brown colour.
Some areas were applied higher, some lower to get a natural effect. |
 Here
we reach the final work on vegetation: All of those expensive trees
were applied with hot glue. Here
we reach the final work on vegetation: All of those expensive trees
were applied with hot glue.
At this point I had put some white glue between some planks with a
toothpick so I could attach some grass. |
Final
Step: The Camouflage Nets
Now it comes to the showdown. I bought some fine net for gift wrap at
the local fancywork shop and sprayed it in dark brown.
To get it to over the box, I had to tighten holders of 0,3 mm copper
wire. I started at the back and worked to the front.
The nets were carefully stretched over the holders and fixed in place
with knots of 0,1 mm copper wire.
The result was sprayed again to hide the shiny copper wire.
The last step was pretty easy: I applied little dots of white glue on
the net and scattered leaf material over it in stripes.
Excess material was removed with a vacuum cleaner.
I would like to present two time-consuming projects I finished in the
fall of 1999.
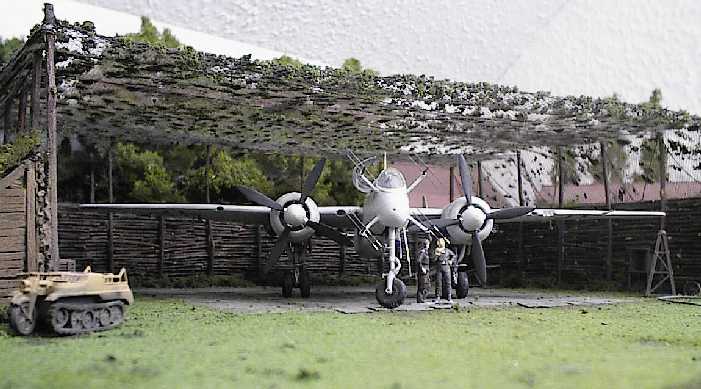
The Heinkel He219 "Uhu" in two variants. The first photo shows a
heavily modified DML Kit.
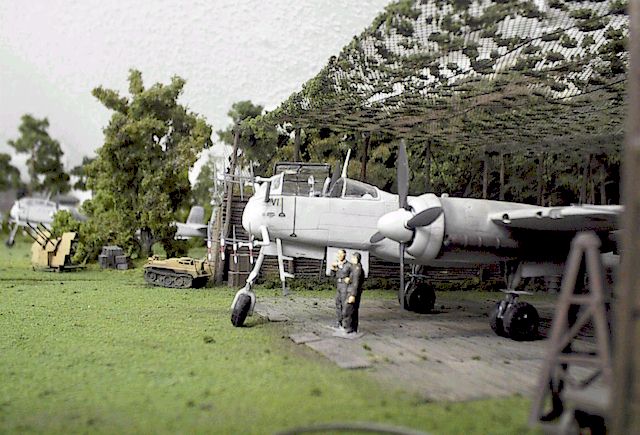
It is the prototype V18 that was used for engine tests (Jumo 213, Jumo
222) and had four-bladed props. The camo scheme is a little bit
speculative: A grey-typed RLM 76 as base colour, with very faded RLM 75
shades. Many thanks to my friend Mikhail Poutnikov from Russia for the
Equipage real rubber wheel set!!
 On the
next pic, the other UHU, G9+DH from I.NJG 1 is to be parked into the
shelter box. The camo scheme is well documented and was the result of
several attempts. The full-sized picture may be viewed by clicking the
thumbnail to the left. On the
next pic, the other UHU, G9+DH from I.NJG 1 is to be parked into the
shelter box. The camo scheme is well documented and was the result of
several attempts. The full-sized picture may be viewed by clicking the
thumbnail to the left.
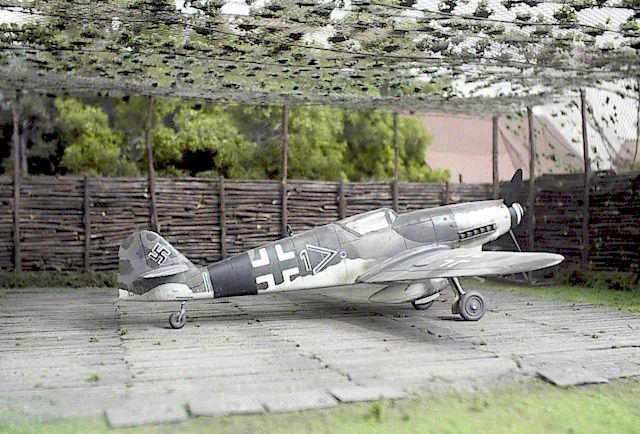
And finally a small one. This is the Revell/ProModeller Bf 109G-10 of
JG53, Decals by Aeromaster.
If you are not afraid of a lot of boring handiwork, try this type of
project.
The result was a lot of fun for me, and allowed me to present my models
on an unusual stage. Maybe some of these techniques will be of interest to
armor modellers, because many of the techniques can be useful for AFV
subjects too.
The next instalment of this series will be a hangar type again, this
time the INSIDE, with removable walls to allow different angles of shots.
Text, Models and Images Copyright ©
2000 by Helmut Latoschinski
English Brushed Up by Russell Field
Page Created 16 March, 2000
Last Updated
23 January, 2002
Back to
HyperScale Main
Page
Back to
Reference Library |
 Home |
What's New |
Features |
Gallery |
Reviews |
Reference |
Forum |
Search
Home |
What's New |
Features |
Gallery |
Reviews |
Reference |
Forum |
Search