A Guide to Applying Aviaeology
Digital Silk Decals
by Terry Higgins

HyperScale is proudly supported by Squadron.com
Following the Editor's caveat emptor inclusion in yesterday's Aviaeology decal review, I'd like to offer this caveat lector for your consideration.
This article will illustrate the method I use for applying Digital Silk decals.
The model is my old hangar queen Monogram 1/48 scale Mosquito. Decal's were applied with warm, not hot, water though in hindsight, hotter may have improved the response to the one panel line.
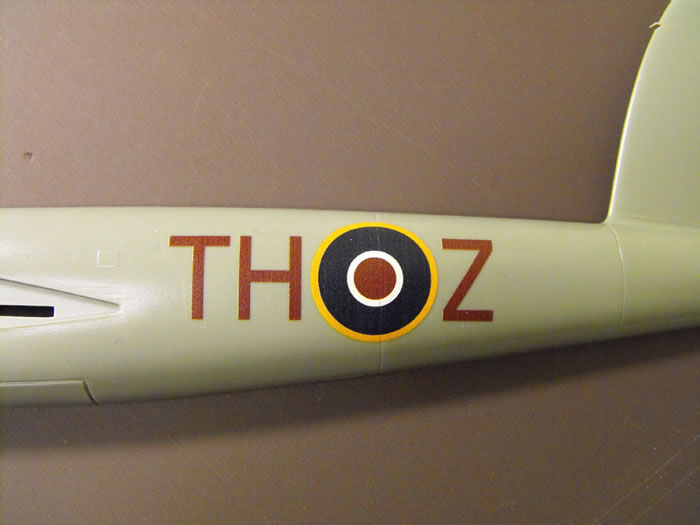
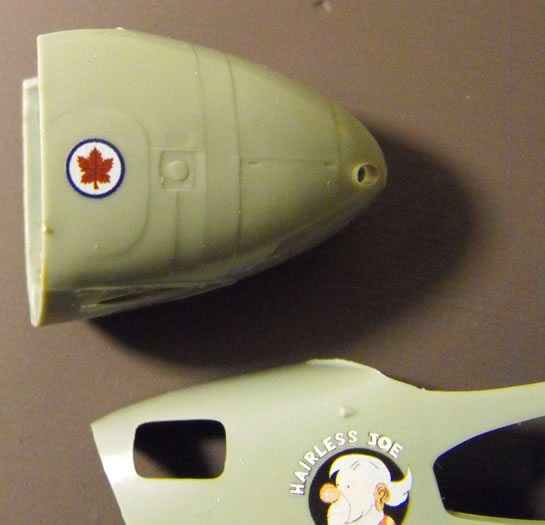
1. The whole TH•Z decal applied over a coat of Future (dry for 2 days) on the bare plastic, then Micro Sol'ed, then allowed to dry. Note that the carrier film, and its adhesive, are very high quality. "Careful trimming" is absolutely unnecessary with this type of carrier, unless the user's decalling technique does not include a good gloss coat prior to application.
There is absolutely zero "silvering". A little bit of carrier edge is apparent just ahead of the "T" and above the "Z". The squiggle above the "H" is a spec of dust that was caught in my Future brushing session. Evidence of the quality of the carrier film in this case I guess.
The ink layer's edges facing the light source highlight due to the thickness of the ink in some places. The panel line through the roundel was creased with a fingernail edge after the Micro Sol was 90% dry (that is, while the underlying adhesive is still tacky enough to help). The tough ink layer allows this kind of rough handling. This could also have been combined with Simon Hopkins hot water/cloth te
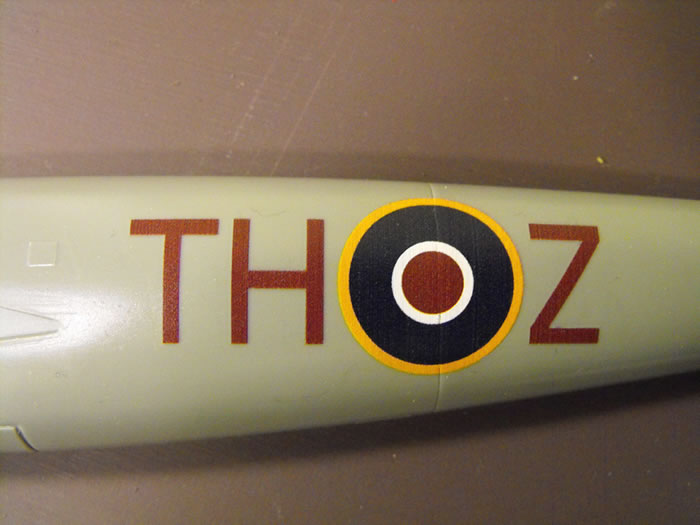
2. A coat of Future brushed over the application and allowed to dry. The D/S surface artifacting (including the reflecting "towards the light source" edge of the "T" mentioned above) is starting to flatten out. This is especially apparent under normal viewing conditions (i.e. not magnified beyond 1:1 as with the photos). This will no doubt get better with the matte coat that almost always follows on camouflaged-finish subjects like the Mossie.
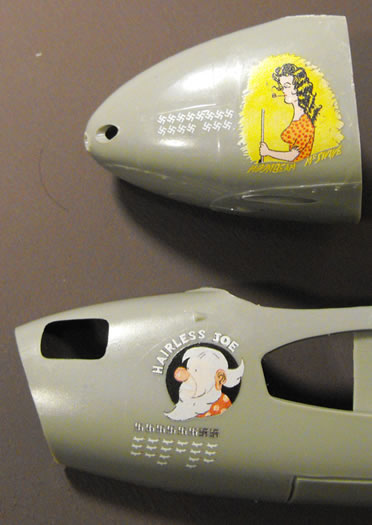
3. Both nose art (2 pieces) applied using technique identical to the fuselage piece. Not so excellent image edges reflections and excellent carrier behaviour typical of all of my D/S tests to date. Predictable, as with the fuselage piece.
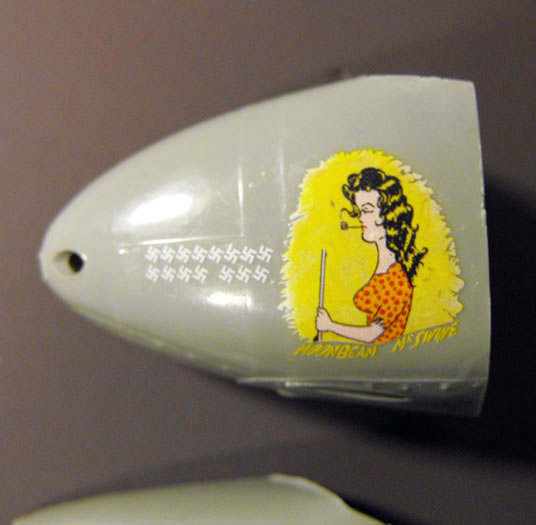
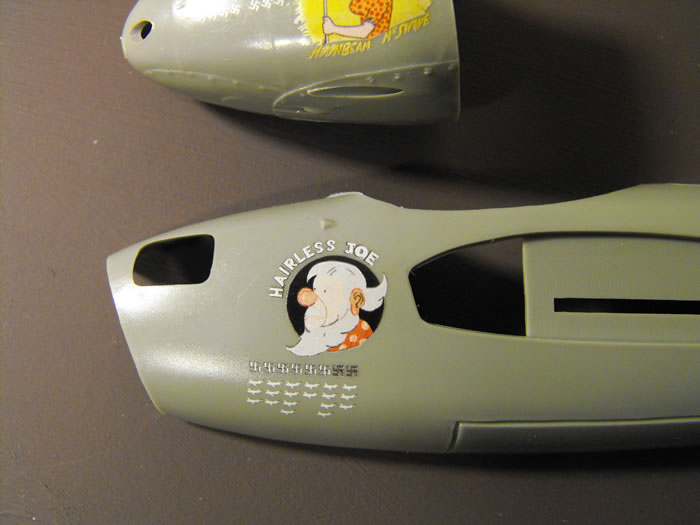
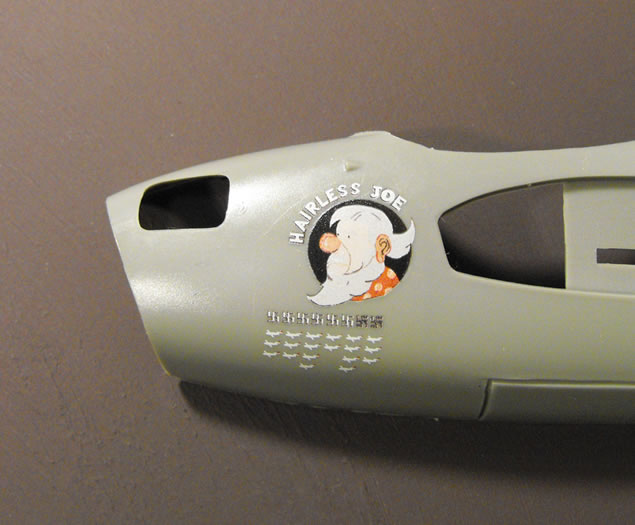
4. Nose pieces with a brush coat of Future over top. Again, carrier film performance is excellent. Sorry to say first two of these three images are a little soft as I got too close for my camera's lens minimum focus distance. A minimal carrier film edge, forward of "Hairless Joe" is still visible, especially in these magnified views. This is barely visible under normal Mk.I eyeball viewing conditions and will virtually disappear once a touch of matte is sprayed overall. The matte will also further reduce any ink edge reflection. A quick whisk with a piece of 600 or 1200 grit might also serve to reduce the chances of seeing carrier and / or ink edges in between overcoats. This is true of any decal application session of course, not just Digital Silk.
Incidentally, the lighter edges of the "Moonbeam McSwine" artwork background patch is inentional, as dictated by the photos of the original art.
I hope this serves to illustrate some positive possibilities.
And to reiterate, for the immediate future we plan to use Digital Silk for multicolour pieces like these nose art bits like the Mosquito set, or for one-off or small quantity custom work. Screen printing will be used for the main pieces (like the "a" and "b" sheets of our 1/24th 418 Squadron Mosquitoes or the entirety of our new Typhoon sets) unless very small run quantities are anticipated (i.e. 1/48 scale Sunderlands, 1/32 scale Bostons).
Models, Text and Images Copyright © 2010 by Terry Higgins
Page Created 30 March, 2010
Last Updated
30 March, 2010
Back to HyperScale Main Page

|
 Home
| What's New | Features | Gallery | Reviews | Reference | Resource Guides | Forum |
Home
| What's New | Features | Gallery | Reviews | Reference | Resource Guides | Forum |