|

HyperScale is proudly supported by Squadron
This is a very simple technique that Dave Roof discovered for making your
CRT's in modern jets look very realistic, and really give some life to your
cockpits. I'm passing this technique along with Dave's permission.
The product is a clear looking confetti made by Amscan, and it is called
Stardust. It may appear in other shapes as well, but this is what I found in my
local craft store in the gift wrap isle. A package costs just over $2 and will
probably last the average modeler a lifetime. The confetti has a reflective
property that when viewed from different angles, changes color and reflectivity.
 The
confetti is thin and very easy to trim in to a square shape, using a sharp hobby
knife or even a quality pair of scissors. The
confetti is thin and very easy to trim in to a square shape, using a sharp hobby
knife or even a quality pair of scissors.
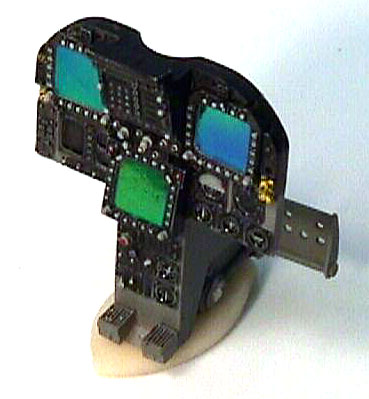
Here is Dave's technique for applying them to the cockpit console: Start by
painting the kit screen black, and follow that with a coat of Tamiya Clear
Green. Cut the confetti to the exact shape needed, and tack in place with
Future, covering the entire screen area. When dry, you'll notice that as you
move your head around the screen, it will indeed change as you move.
Some finished pictures of Dave's cockpit are included to the right and at the
bottom of the page..
For the purpose of this article, I tacked some down on several different colors
to see if the effect would change. It seems the different underlying colors do
have some effect, especially the red which kept a generally gold tone. The black
looks best to me for the purpose of the CRT screens.
|
Home |
What's New |
Features |
Gallery |
Reviews |
Reference |
Forum |
Search