The Battle of the Coral Sea, fought from May 4th-8th, 1942, was
the first naval engagement in history where the opposing ships
neither saw nor directly fired on each other. It also marked the end
of Allied defensive-only activity, and paved the way for future
Allied offensive operations.


Click the images
above to see larger versions
This was the first of six battles between opposing aircraft
carrier forces during the war. This battle resulted from American
and Australian naval and air forces thwarting a Japanese amphibious
operation intended to capture Port Moresby in New Guinea. A Japanese
air base there would have threatened northeastern Australia and
strategic sea lanes, possibly forcing Australia out of the war and
certainly enhancing the strategic defenses of Japan's oceanic empire
and further Japanese expansion into the Pacific.
Click the images above to see larger versions
The Japanese scored a tactical victory by sinking the aircraft
carrier USS Lexington, heavily damaging the carrier USS Yorktown,
and sinking a destroyer and an oiler. Against those losses, the
Americans managed to achieve their first substantial kills against
the Japanese Navy by sinking the light carrier Shoho and severely
damaging the Shokaku, as well as damaging other smaller ships.
Click the images above to see larger versions
In truth the battle was an operational and strategic defeat for
the Japanese--the first major check on their offensive sweep begun
five months earlier at Pearl Harbor.
First, the invasion of Port Moresby was thwarted, boosting Allied
chances in the bitterly fought New Guinea campaign, and fending off
a threat to the supply lines running between the US and Australia.
Second, the Japanese were denied the services of their two newest
carriers on the eve of the Battle of Midway a month later.
Historians have argued whether these two Japanese carriers would
have actually been used at Midway; regardless, had these two
carriers been available at Midway, things might well have turned out
very differently for the Americans.
To put the importance and timing of this battle in context, we
need to take a quick look at what else was happening in late April -
early June 1942.
- April 23rd was the beginning of the Luftwaffe's air attacks
against the British cathedral cities.
- On May 1st, General Carl Spaatz was designated commander of
the Eighth Air Force, which had not yet left for England and was
still Stateside at Bolling Field, Washington, DC.
- On May 4th, US Navy aircraft attacked the Japanese invasion
fleet at Tulagi Island, the first shots in what developed into
the Battle of the Coral Sea.
- Corregidor Island in the Philippines surrendered to the
Japanese invaders on May 6th, ending US resistance in the
Philippines.
- May 7th marked the sinking of the Japanese light carrier
Shoho by US Navy dive bombers, while the Japanese sank a US
oiler and destroyer, mistaking them for a US carrier and
cruiser. US Army Air Force bombers mistakenly attacked US ships,
but caused no damage. During the day, the Japanese invasion
force headed for Port Moresby turned back towards Rabaul.
- May 8th was the day the US Navy lost the USS Lexington (much
more on this below).
- May 8th was also the day the Germans began their Crimean
offensive in Russia.
- It was not until five days after the end of Coral Sea combat
that the first 8th Air Force bomber squadron, minus its
aircraft, reached England (May 13th).
- June 4th-7th was the pivotal Battle of Midway, which truly
turned the tide of the war in the Pacific.
|
The forces
involved and the timeline |
The Japanese campaign included two seaborne invasion forces, the
main one aimed at Port Moresby, and a smaller one targeting Tulagi,
in the Southern Solomons. These would be supported by Japanese
land-based airpower from bases to the north and by two naval forces
containing a small aircraft carrier, several cruisers, seaplane
tenders and gunboats. Simultaneously, a powerful screening force
built around the big carriers Shokaku and Zuikaku sortied from Truk
to prevent interference from any Allied naval forces that might be
in the area.
The U.S. Navy, tipped off to the enemy plans by superior
communications intelligence and codebreaking, countered with two of
its own carriers, plus cruisers (including two Australian cruisers),
destroyers, submarines, land-based bombers and patrol seaplanes.
Sunday, May 3rd, 1942
On May 3rd, the smaller of the two Japanese naval forces made an
unopposed landing at Tulagi in the southern Solomons. The small
force of Australian commandos and airmen who had garrisoned Tulagi
evacuated the previous day, having been notified by coastwatchers
that the Japanese were en route. (Read a short but fascinating
history of the Japanese invasion of Tulagi
here).
While Tulagi was being occupied, the main force of the Japanese
Fourth Fleet was completing its final preparations for the
amphibious invasion of Port Moresby, which was scheduled to start on
May 10th.
Monday, May 4th, 1942
The USS Yorktown, which had been refueling at Espiritu Santo, ran
north and launched three air strikes against the Japanese shipping
in Tulagi Harbor, hitting a destroyer and several small boats. It
then returned southward to rejoin the Lexington.
|
|
|
|
Yorktown SBD aircraft return to their carrier
after striking Japanese shipping in Tulagi harbor.
|
Koei Maru (center) is straddled by bombs while at
anchor in Tulagi harbor during the attacks by
Yorktown aircraft.
|
Click the images above to see larger versions
Meanwhile, long range, land-based bombers from General
MacArthur's SWPA command were combing the seas for the Japanese
convoy approaching Port Moresby, but failed to locate it either that
day or the next.
Tuesday, May 5th, 1942
Allied intelligence reported that Port Moresby was the main enemy
objective and that landings could be expected any time between May
5th and May 10th. B-17s and B-26s of the SWPA stood by for an attack
order, while other planes carried out neutralizing raids to keep
Japanese land-based air power from participating in the coming
battle.
Wednesday, May 6th, 1942
It was not until late on the 6th, however, that three AAF B-17s
finally located the Japanese invasion force headed for the Jomard
Passage and the Louisiade Islands. US Rear Admiral Frank "Jack"
Fletcher, Commander of the Allied Fleet, dispatched a group of
cruisers and destroyers to cover the Jomard Passage, and moved north
with his carrier force to contact and close with the main enemy
fleet.
Thursday, May 7th, 1942
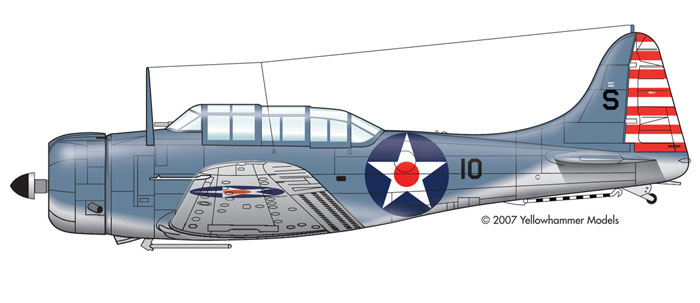
 SBD-3, LTJG William E. Hall, VS-2, USS Lexington
Battle of the Coral Sea, May 7th-8th, 1942
The opposing commanders, Admiral Fletcher and Japanese Vice
Admiral Takeo Takagi and Rear Admiral Tadaichi Hara, endeavored to
strike the first blow, an essential tactic for victory (and
survival) in a battle between heavily-armed and lightly-protected
aircraft carriers.
However, both sides suffered from inadequate efforts by their
scouts and launched massive air strikes that sank relatively
unimportant secondary targets, while leaving the most important
enemy forces untouched.
That morning, American scout planes reported sighting an enemy
carrier, which proved to be the Shoho, and four heavy cruisers off
Misima Island. Unfortunately, they were misreported as "two carriers
and four heavy cruisers".
Ten B-17s were immediately sent to attack at high level. They
were unsuccessful, but were able to start a fire on one cruiser.
More important, by throwing the Japanese formation into complete
disorder they caused the carrier to reverse its course.
Yorktown and Lexington sent a huge strike force of fifty-three
scout-bombers, twenty-two torpedo planes and eighteen fighters. They
caught the Japanese unprepared, with few planes in the air and with
their carrier headed away from the wind. Nine bomb hits and four
torpedoes sank the Shoho within five minutes after the first blow
was struck.
Click the images above to see larger versions
A second strike aimed at the retiring enemy force was readied but
not ordered aloft because the other Japanese carriers had not yet
been located.
The undiscovered Shokaku and Zuikaku were meanwhile to the
northeast, frantically searching for the American aircraft carriers.
Japanese scouting planes from these two ships spotted the American
oiler USS Neosho (AO 23) and her escort, the destroyer USS Sims (DD
409), before 8 AM, far to the south of Admiral Fletcher's carriers.
Misreported as a "carrier and a cruiser" by the Japanese scouts,
the two ships were attacked twice by high-level bombers, but escaped
unscathed.
However, about noon a large force of dive bombers appeared
overhead, and they did not miss. Sims sank with very heavy
casualties and Neosho was reduced to a drifting wreck whose
survivors were not rescued for days. Admiral Fletcher did not learn
of this attack until dusk, too late to take any effective
counteraction.
Compounding the Japanese misunderstanding of the situation,
Japanese land-based torpedo planes and bombers struck the force of
Australian and American cruisers far to the west of Admiral
Fletcher's carriers. Skillful ship handling prevented any damage to
the Allied ships.
Adding to the general confusion, several Australia-based U.S.
Army B-17s also arrived over the Allied ships and dropped their
bombs, fortunately without hitting anything.
All this had one beneficial effect: the Japanese ordered their
Port Moresby invasion force to turn back to await developments.
The Japanese learned of the sinking of the Shoho as their planes
were returning from the attack on the tanker group, and at dusk
about twenty-seven bombers and torpedo planes again left the Shokaku
and Zuikaku in another effort to locate and sink the Lexington and
the Yorktown.
After a long and fruitless search, the planes were forced to
jettison their bombs and torpedoes and head back to their ships.
During the return flight, these planes passed over the United States
carriers at night and some landings were actually attempted before
the Japanese pilots realized their mistake.
Almost none of the aircraft successfully returned to their
carrier--a huge and wasteful loss of combat crews and aircraft.
Friday, May 8th, 1942
Before dawn on May 8th, both the Japanese and the American
carriers dispatched scouting planes to locate their opponents. These
made contact a few hours later, by which time the Japanese strike
force was already airborne. The US aircraft launched soon after 9
AM, and task force commander Admiral Fletcher turned over tactical
command to Rear Admiral Aubrey W. Fitch, who had more carrier
experience.
Each side's planes attacked the other's ships at about 11 AM.
While the Japanese ships were partially concealed by heavy weather,
the American ships were operating under clear skies.
Planes from Yorktown hit the Shokaku, followed somewhat later by
part of USS Lexington's air group. These attacks left Shokaku unable
to launch planes, and she left the area soon after to return to
Japan for repairs. Her sister ship, Zuikaku, was steaming nearby
under low clouds and was not molested.
Click the images above to see larger versions
In addition to reconnaissance and preparatory raids against enemy
air installations, Army Air Force land-based aircraft from the SWPA
continued to support the action of the naval forces by flying some
forty-five sorties against the enemy fleet. Bad weather intervened,
however, and frustrated all attempts to bomb the crippled Shokaku,
which succeeded in escaping to the sanctuary of Rabaul.
The Japanese struck the American carriers in a fast and violent
action, scoring torpedo hits on Lexington and with bombs on both
carriers.
Click the image above to see larger versions
Lexington was struck by a torpedo to port. Moments later, a
second torpedo hit to port directly abreast of the bridge.
Simultaneously, she took three bomb hits from enemy dive bombers,
and may have received as many as seven bomb and torpedo hits in all.
These attacks left her with a 7 degree list to port and several
raging fires.
Click the image above to see larger versions
Click the images above to see larger versions
By 1 PM her damage control parties had brought the fires under
control and returned the ship to even keel; making 25 knots, she was
ready to recover her air group. Suddenly and unexpectedly, Lexington
was shaken by a tremendous explosion, caused by the ignition of
gasoline vapors below decks, and again fire raged out of control.
At 4 PM, Capt. Frederick C. Sherman, fearing for the safety of
his men working below decks, secured salvage operations, and ordered
all hands to the flight deck. Admiral Fitch ordered "abandon ship" a
few minutes after 5 PM, and the men began going over the side into
the warm water to be immediately rescued by nearby cruisers and
destroyers. This effort was so well executed that no additional
sailors were lost in the rescue.
The now mortally wounded Lexington blazed on, flames shooting
hundreds of feet into the air. Finally, the destroyer USS Phelps (DD
361) closed to 1500 yards, fired two torpedoes into the carrier's
hull and the "Lady Lex" slid beneath the waves. (Please note the
1935 official US Navy photo of the Phelps below shows a different
hull number.)
Click the image above to see larger versions
|
The Battle
of Coral Sea ends |
As May 8th drew to a close, both sides retired from the immediate
battle area. In addition to the carriers and other ships lost, both
sides experienced heavy aircraft losses. The US losses totaled 66
and postwar interrogations of Japanese survivors of the battle put
Japanese aircraft losses much higher than 100.
Zuikaku returned to the area for a few days, even though her
aircraft complement was badly depleted, but as the invasion of Port
Moresby had been called off, she withdrew on May 11th. At about the
same time USS Yorktown was recalled to Pearl Harbor. After receiving
quick repairs, she would play a vital role in the Battle of Midway
less than a month later.
The Battle of the Coral Sea prevented the Japanese from occupying
Port Moresby by sea and temporarily delayed their plans to capture
Guadalcanal and occupy the Solomons.
The Allies gained time in their race to improve defenses in New
Guinea and northeastern Australia.
Truthfully, the American victory was purely defensive. Allied
forces in the Southwest Pacific were still unable to launch a major
offensive. The Japanese had lost an important battle, but the
strategic initiative still remained in their hands--at least until
the pivotal Battle of Midway just a month away.
Author's Note: I am indebted to
historians at the US Navy and US Army historical centers and the
National Archives, as well as many others, for the information
and photos in this article.
 Home |
What's New |
Features |
Gallery |
Reviews |
Reference |
Forum |
Search
Home |
What's New |
Features |
Gallery |
Reviews |
Reference |
Forum |
Search