 Home |
What's New |
Features |
Gallery |
Reviews |
Reference |
Forum |
Search
Home |
What's New |
Features |
Gallery |
Reviews |
Reference |
Forum |
Search
|
|
Cutting
Edge Corrected by Don Fenton
The Cutting Edge 1/48 scale replacement B-25 cowlings do not quite fit when mated to the AM backing plate that has the cowl flaps. A slight but noticeable mismatch in outside diameter exists, producing a small "step". This is the result of the AM engine cowling being slightly ovoid in cross-section. The ovoid cross-section extends back to the engine nacelle. The cross-section of the cowling and engine nacelle just aft of the flaps should be circular. As an aside, the Revell B-25J kit shares this ovoid shape as well. Fortunately, the CE cowlings correct the length, opening diameter and the cross-section problems found in the AM kit engine cowlings. The CE cowlings can used as is, if you do not wish to make any changes to adapt them for a better fit. Improving the fit and correcting the ovoid shape can be easily done. The following procedure is one method to adapt the CE cowlings:
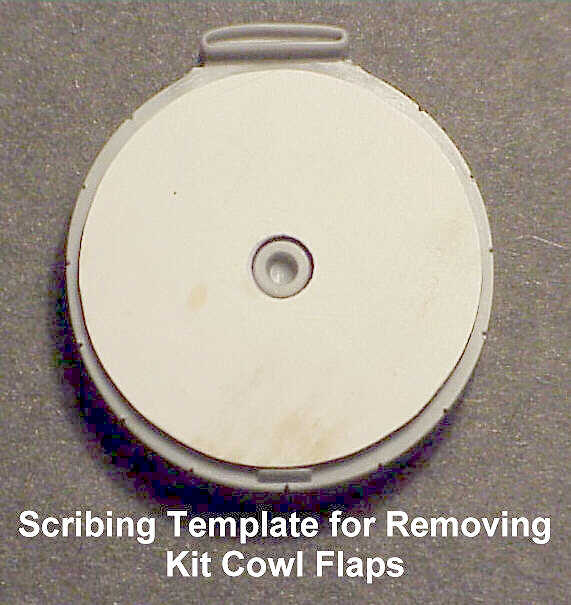
Step One: Make a Template to use as a Guide for Removing the Kit Cowl Flaps. Rather than describe the template, the image below shows the template to be used as a scribing tool. This template was made by inscribing, with a compass, a circle on a piece of thick plastic, center drilling using the compass center mark as a reference and then cutting it out.
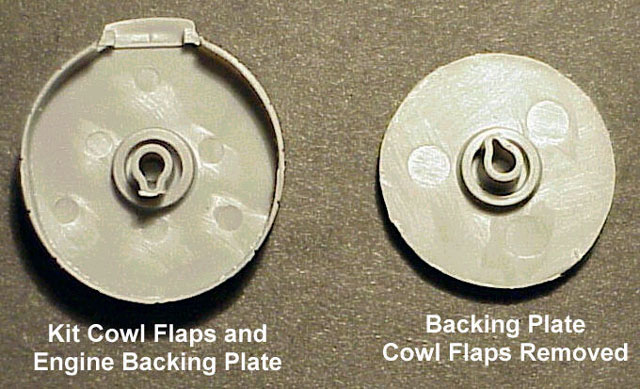
Step Two: Removing the Kit Cowl Flaps Temporarily mate the CE cowl to the kit cowl flap mounting plate. Use a marker pen to put an alignment mark on the CE cowling where the bottom of the kit cowl flaps line up. This mark will be used to line up the cowl flaps when the time comes. Make two saw cuts on either side of the carb intake. Run a scribing tool repeatedly around the edge of template. This will produce a groove just inside of the kit flaps. Remove the carb intake. Use a blade in the groove to carefully sever the flaps in one piece. The image below shows what's left after the cowl flaps and carb intakes are removed.
Step Three: Attach the Cowl Flaps to the CE
Step Four: Prepare Mounting Plate for Installation
This method can be used for the Cutting Edge Late B-25 Cowlings as well. The Late Cowlings have the Clayton "S" stacks. And as a nice touch, the individual exhaust stack is molded within each exhaust fairing on the cowling. This improves the appearance of the kit "S" stacks in the AM C/D kit and the AM G conversion set. And, I haven't tried it, but the CE Late Cowlings may fit the Monogram B-25J. This would correct the cross section problem of the engine cowling and saves the modeler the need to hog out all those fairings, if you are so inclined. Text and Table Copyright ©
2000 by Don Fenton
|

 Cowling
 The
mounting plate is now carefully sanded to fit inside the cowling. Be
careful. Not much is required to make the plate fit. This restores proper
orientation of the engine within the cowling. Nothing worse than finding
out later that the engines are off-center, so check.
The
mounting plate is now carefully sanded to fit inside the cowling. Be
careful. Not much is required to make the plate fit. This restores proper
orientation of the engine within the cowling. Nothing worse than finding
out later that the engines are off-center, so check.